
As part of a primitive technology course I was taking with Woodcraft School back in 2009 I had to make various craft pieces. The aim of the course was to slowly take away our modern tools so that by the end of the course we would only be using primitive tools to make our craft items.
I was using hand-held flint tools such as discoidal knives in the beginning but about halfway through the course I decided something a bit better was required. This How To…. is designed to show you the simple steps I took to make my flint knife and show you some of the uses I have put it to since.
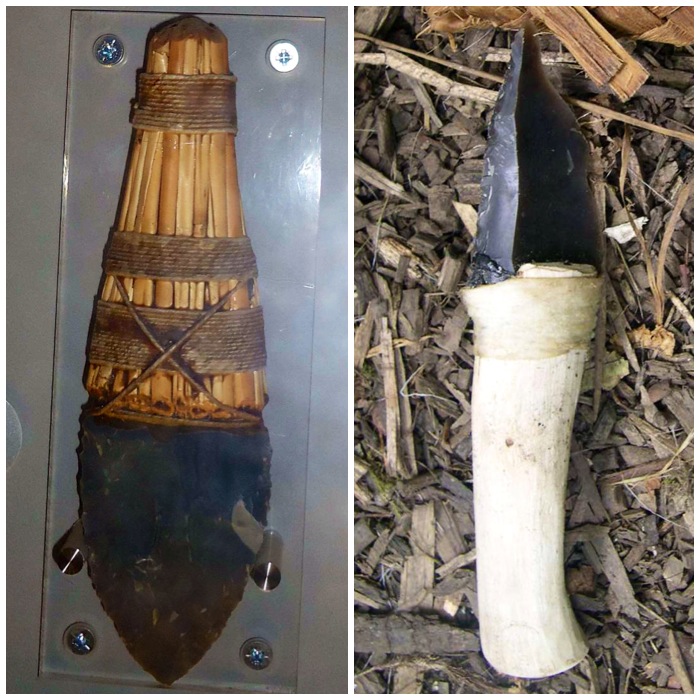
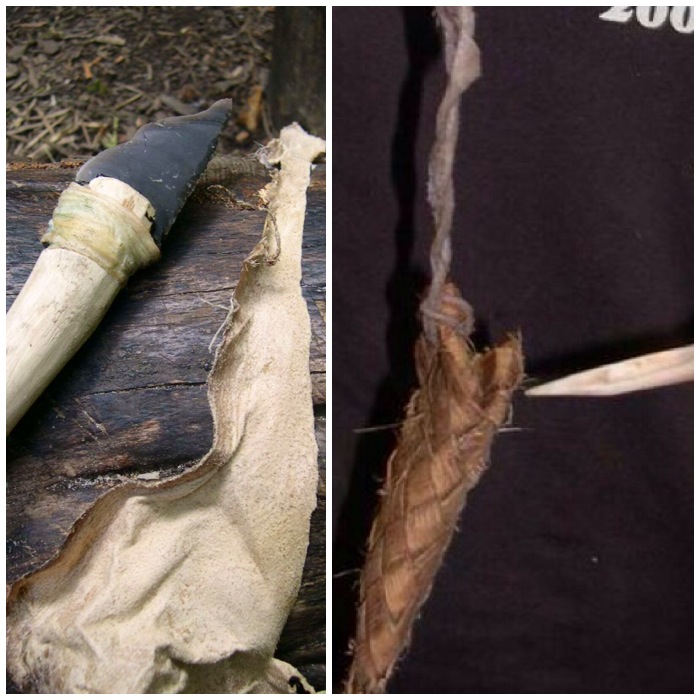
During the course (spread out over 5 months) I came across the knife you can see below left in the Museum of Prehistory at Cheddar Gorge. Not only was the knife beautifully constructed it also looked strong and practical. I knew I was to be taught on the next part of the course by top flint knapper John Lord so was keen to keep my eye out for a suitable piece while I was knapping flint with him. The knife I made on the course is on the right, not as strong or anywhere near as beautiful but for my needs very practical.
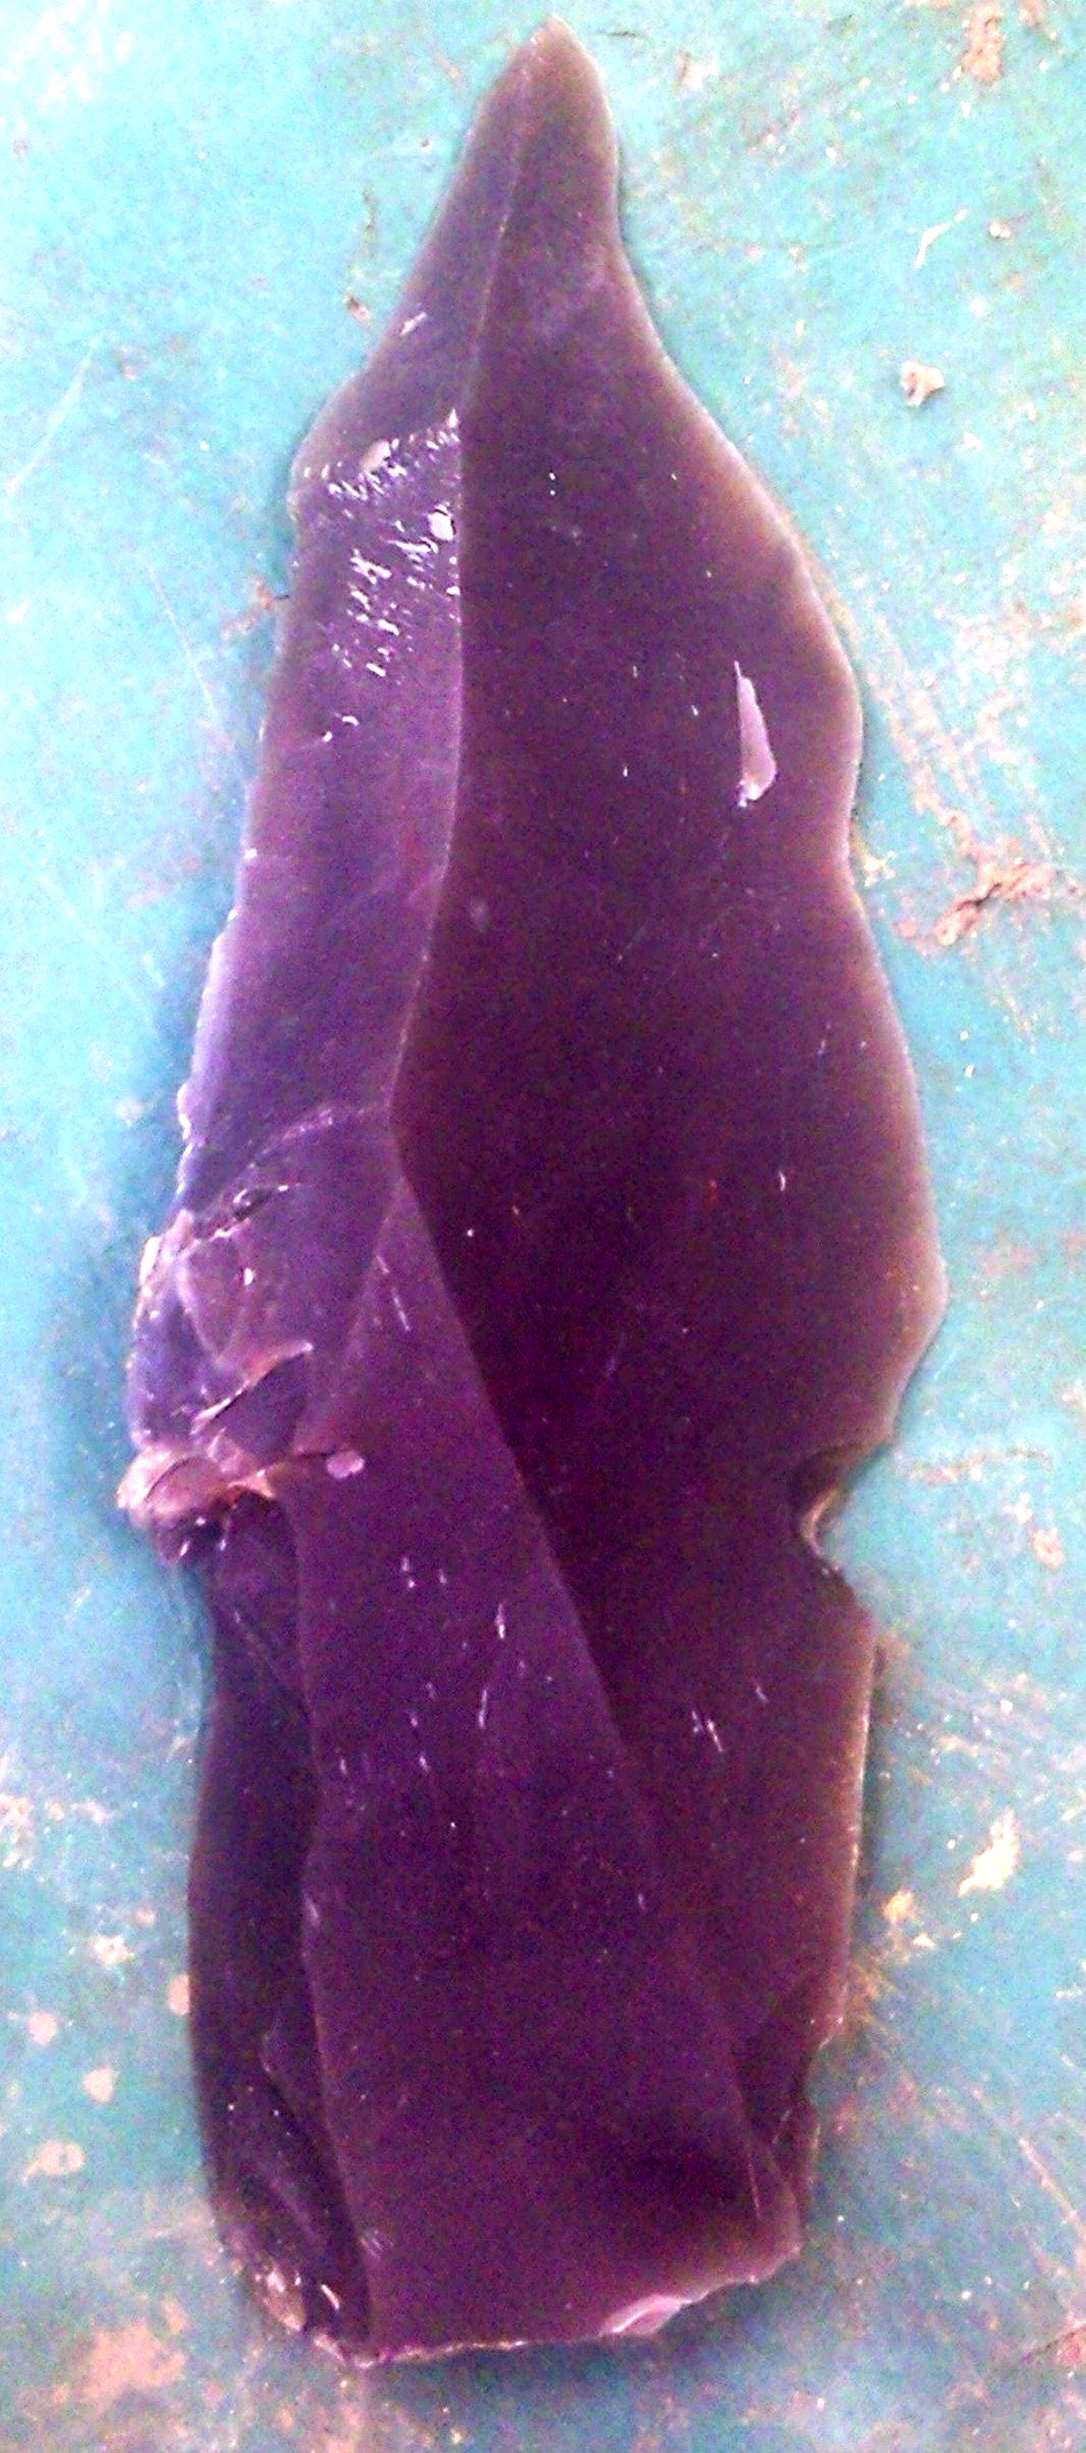
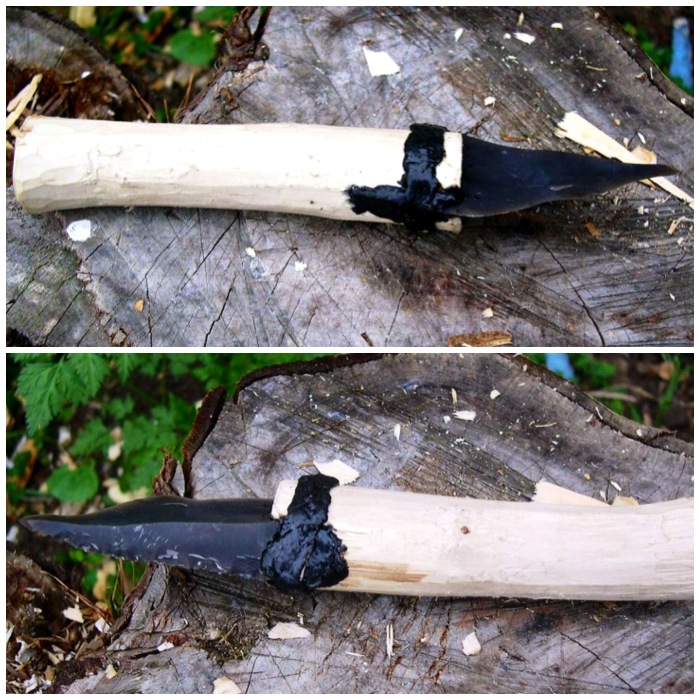
It was while I was knapping my flint axe head that I saw this piece pop off. The piece had a strong back, a sharp edge with good curves and a perfect point. I re-touched the back to smooth it down a bit and pressure flaked a groove where the sinew wrap to the handle would be.
I’m afraid I didn’t take many pictures of the handle preparation as it wasn’t going into my portfolio: I used a modern saw and knife for this part to save time. (As I said at the beginning of the post the course was designed to introduce me to primitive crafts by gradually reducing my reliance on modern tools.)
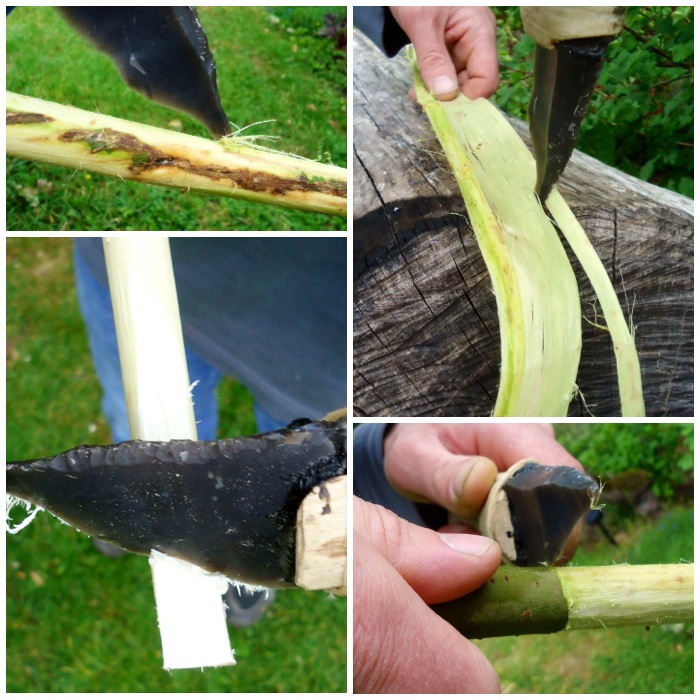
I selected a piece of dead standing wood that was well seasoned and had a slight curve in it, to make for a more comfortable grip and also to reduce the amount of carving necessary. I then used my saw to cut two stop cuts in a ‘V’ shape into the end of the wood. Since finishing the course I now know that a piece of serrated flint would have done this job just as well, if a bit slower.
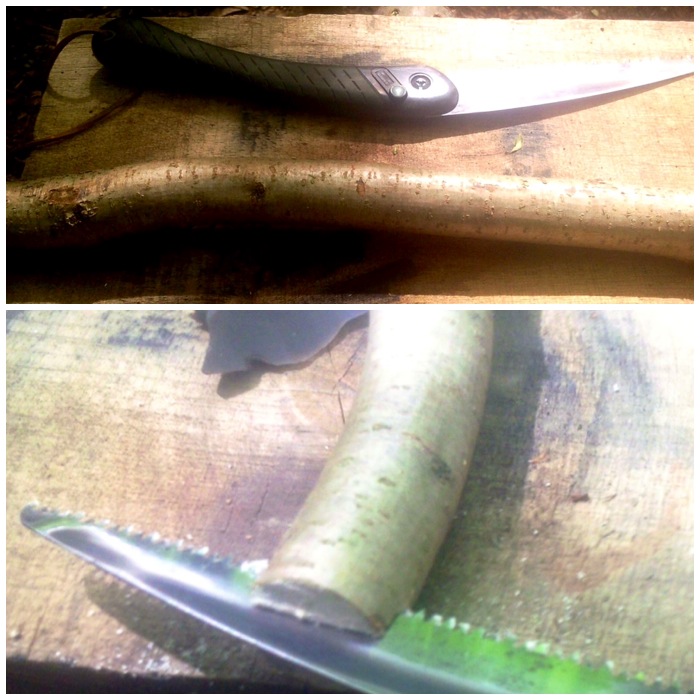
Once I had the stop cuts in place I used the tip of my steel knife to cut out the centre of the ‘V’ for the tang part of the flint blade to fit into. Then using my steel knife I carved the wood down into the final handle shape.

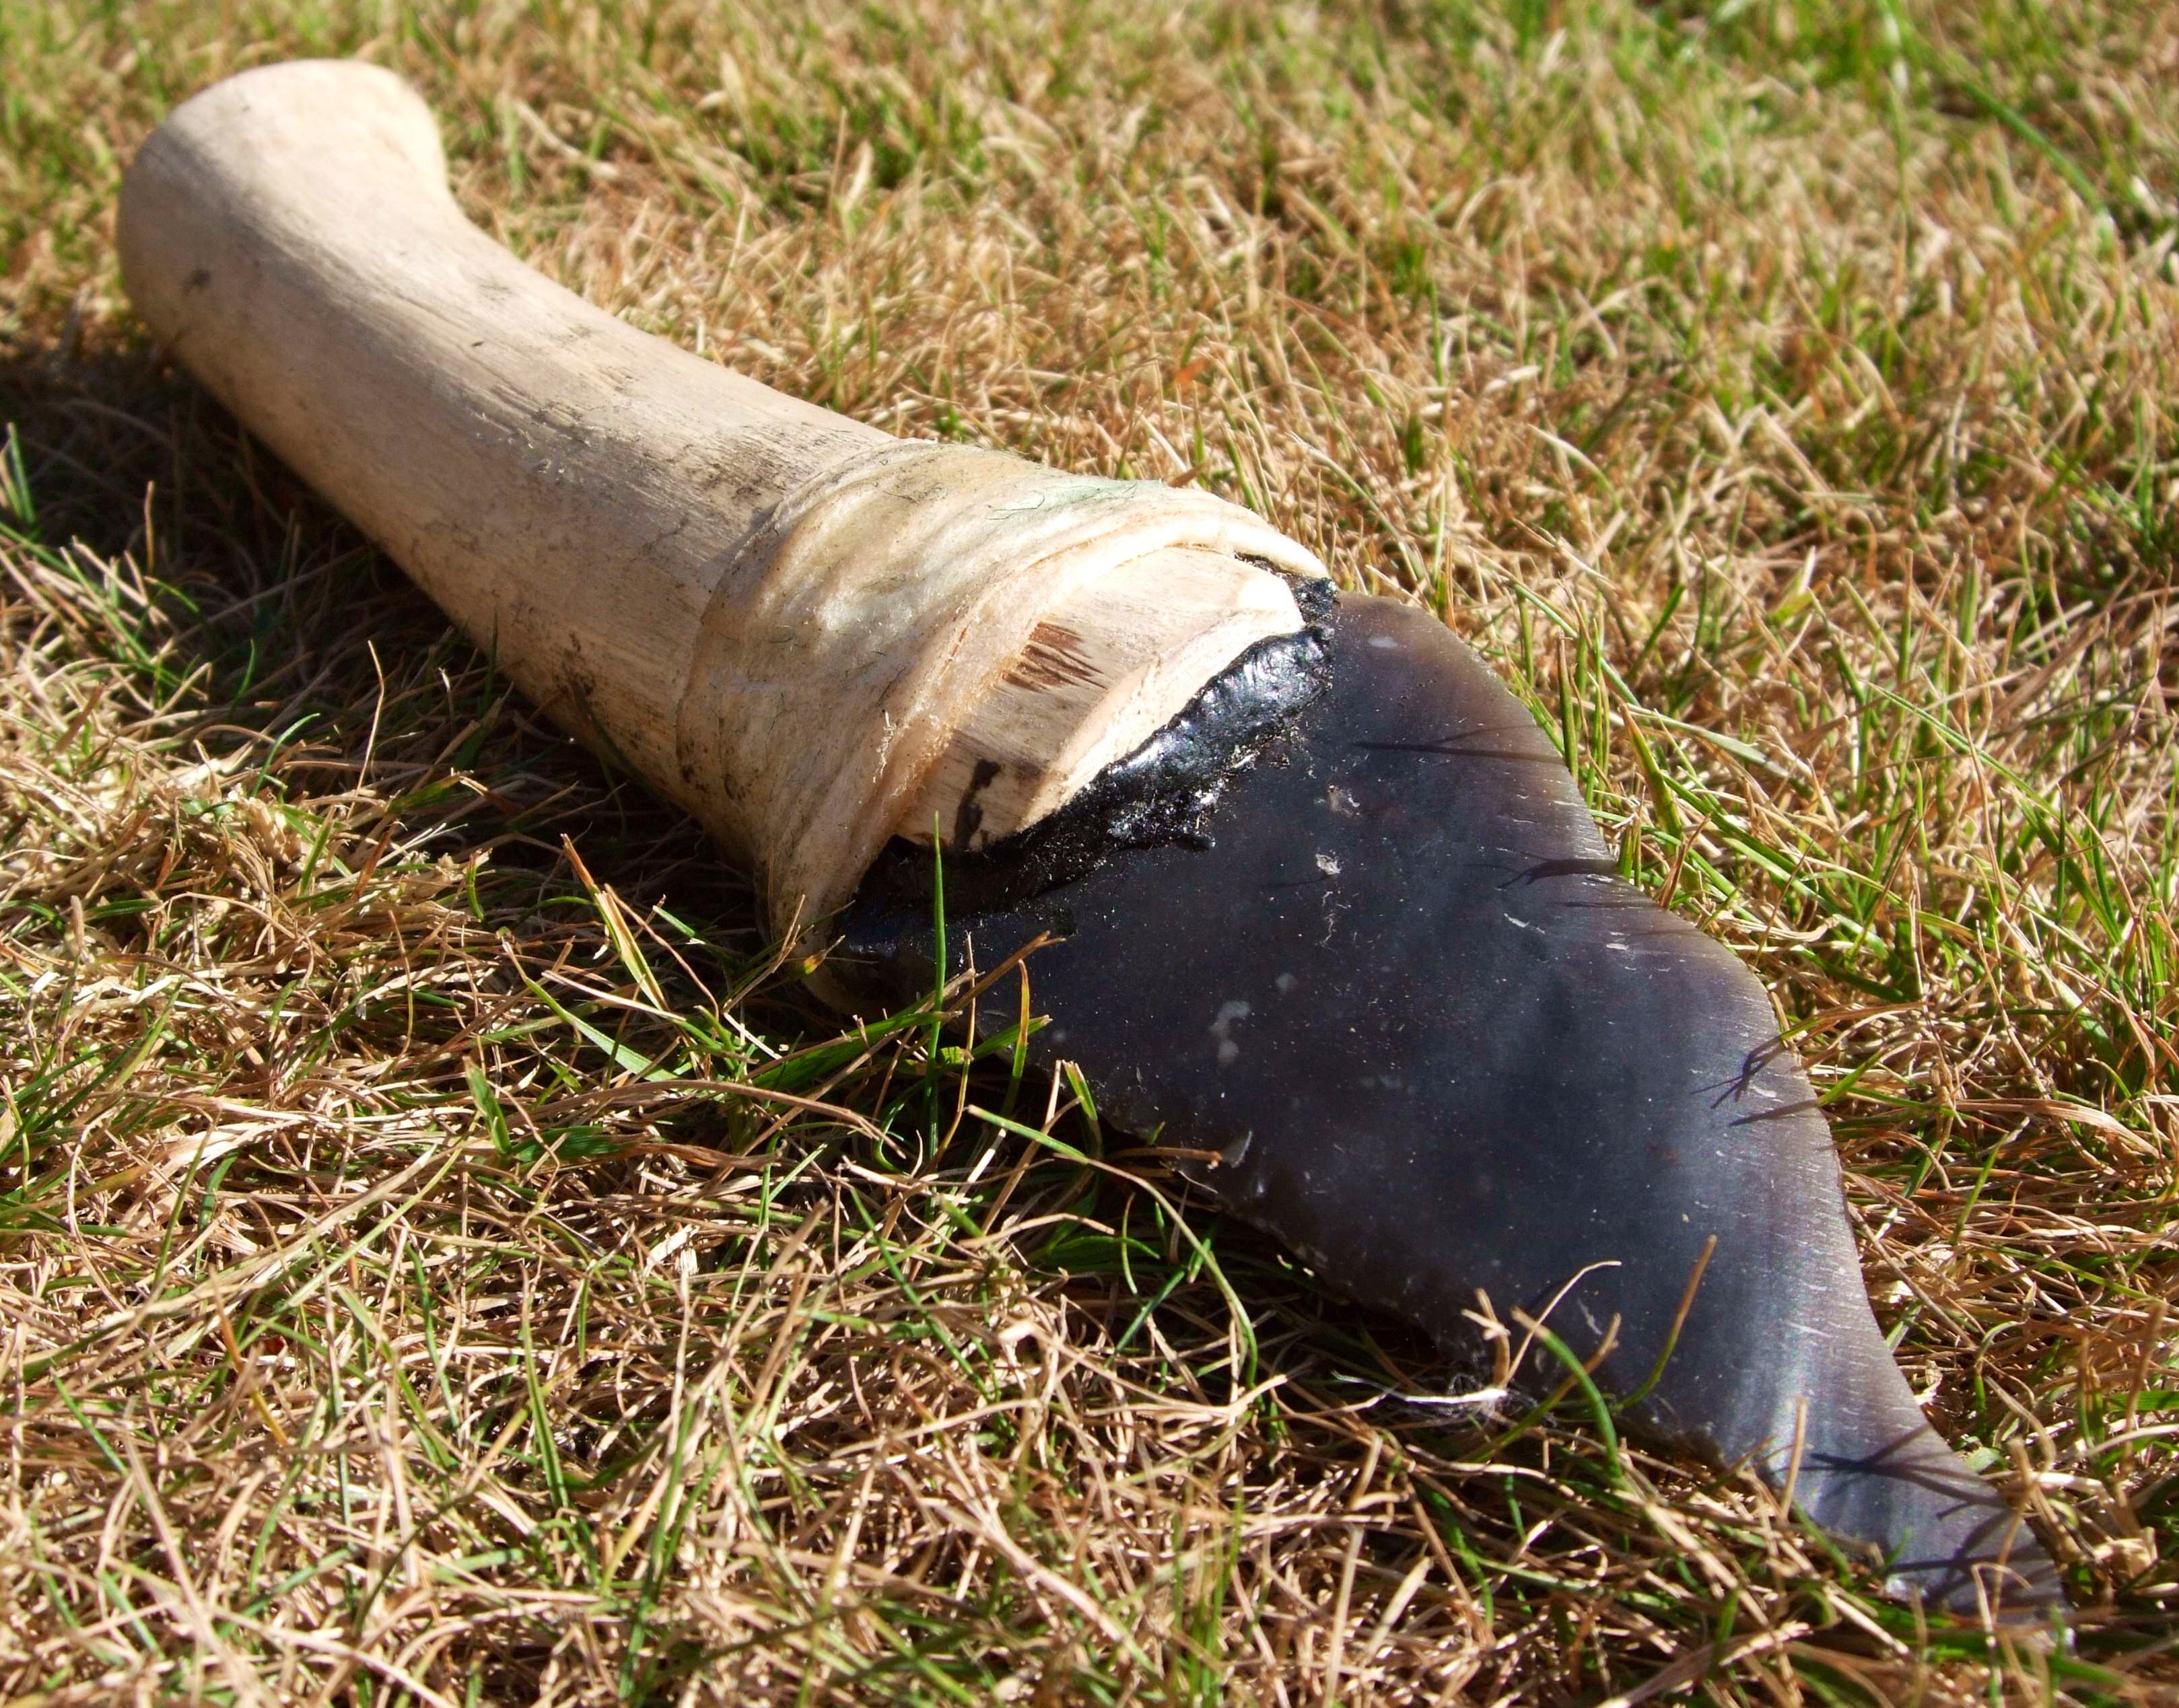
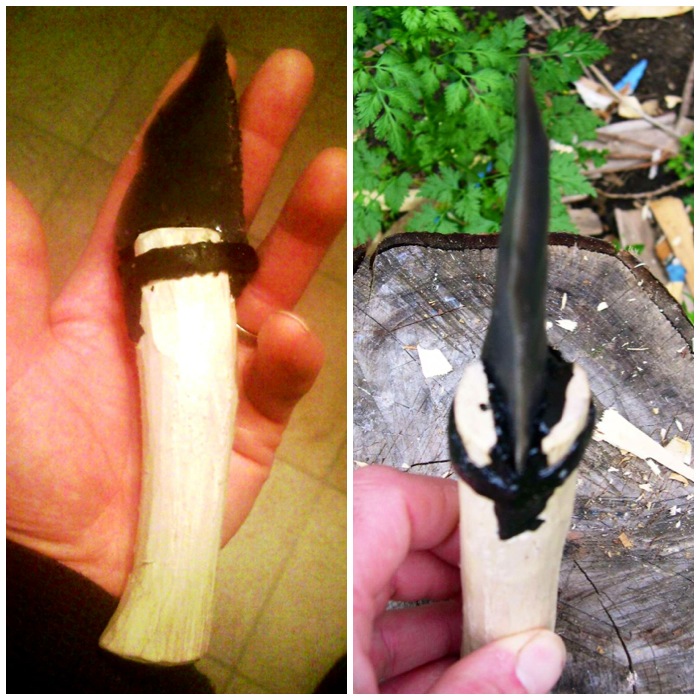
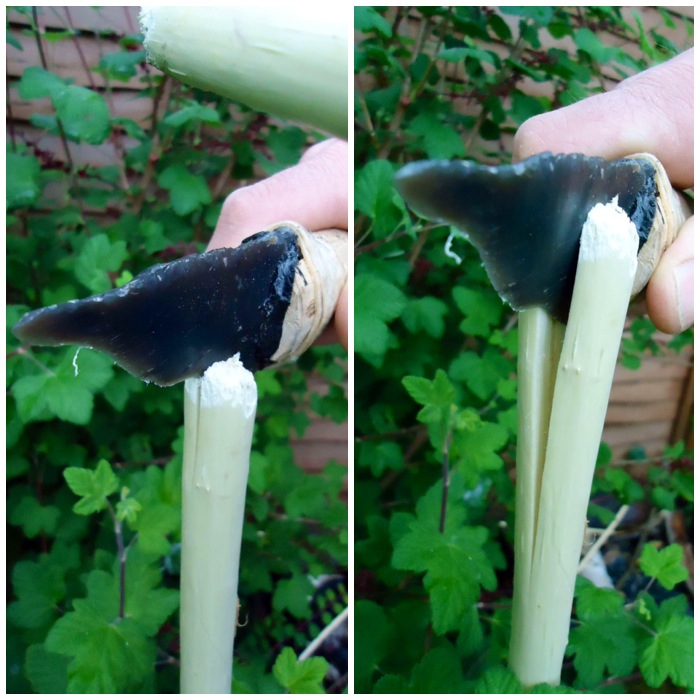
I filled the ‘V’ notch with some spruce pitch (see my article on arrow making for making spruce pitch) and slid the tang of the flint blade into the notch. I then bound the hilt of the handle with sinew to secure it and covered the sinew with more pitch to protect it. Within 24 hours this knife was ready to use.
Not the best pictures I am afraid but as you can see this knife was the perfect size and shape to use on many of the jobs I would normally use a steel knife for.
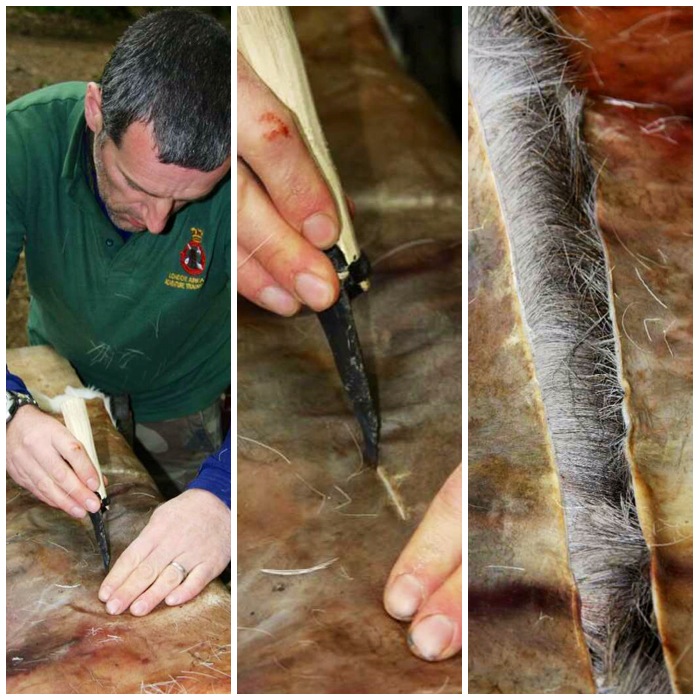
The purpose for which I created the knife was tanning some deer skin on the course. When splitting the hide of the deer the knife was comfortable to use and the top curve near the tip cut through the hide like a knife through butter.
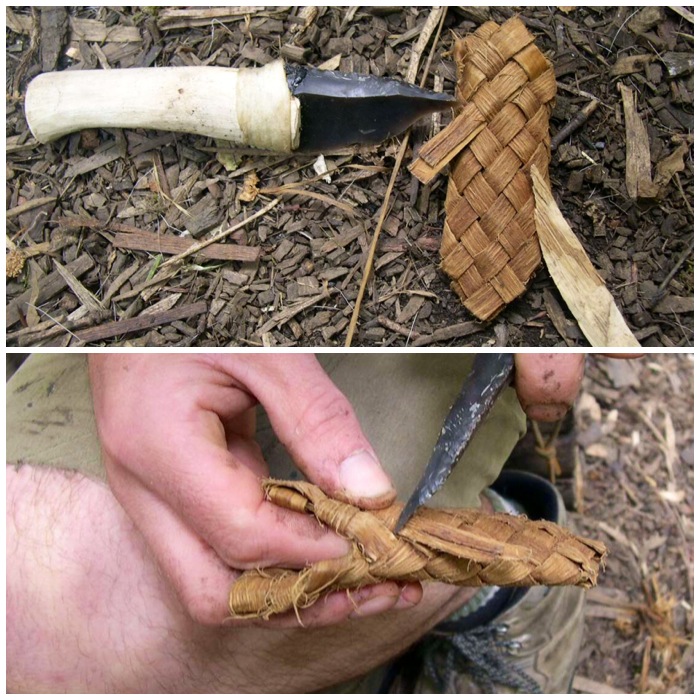
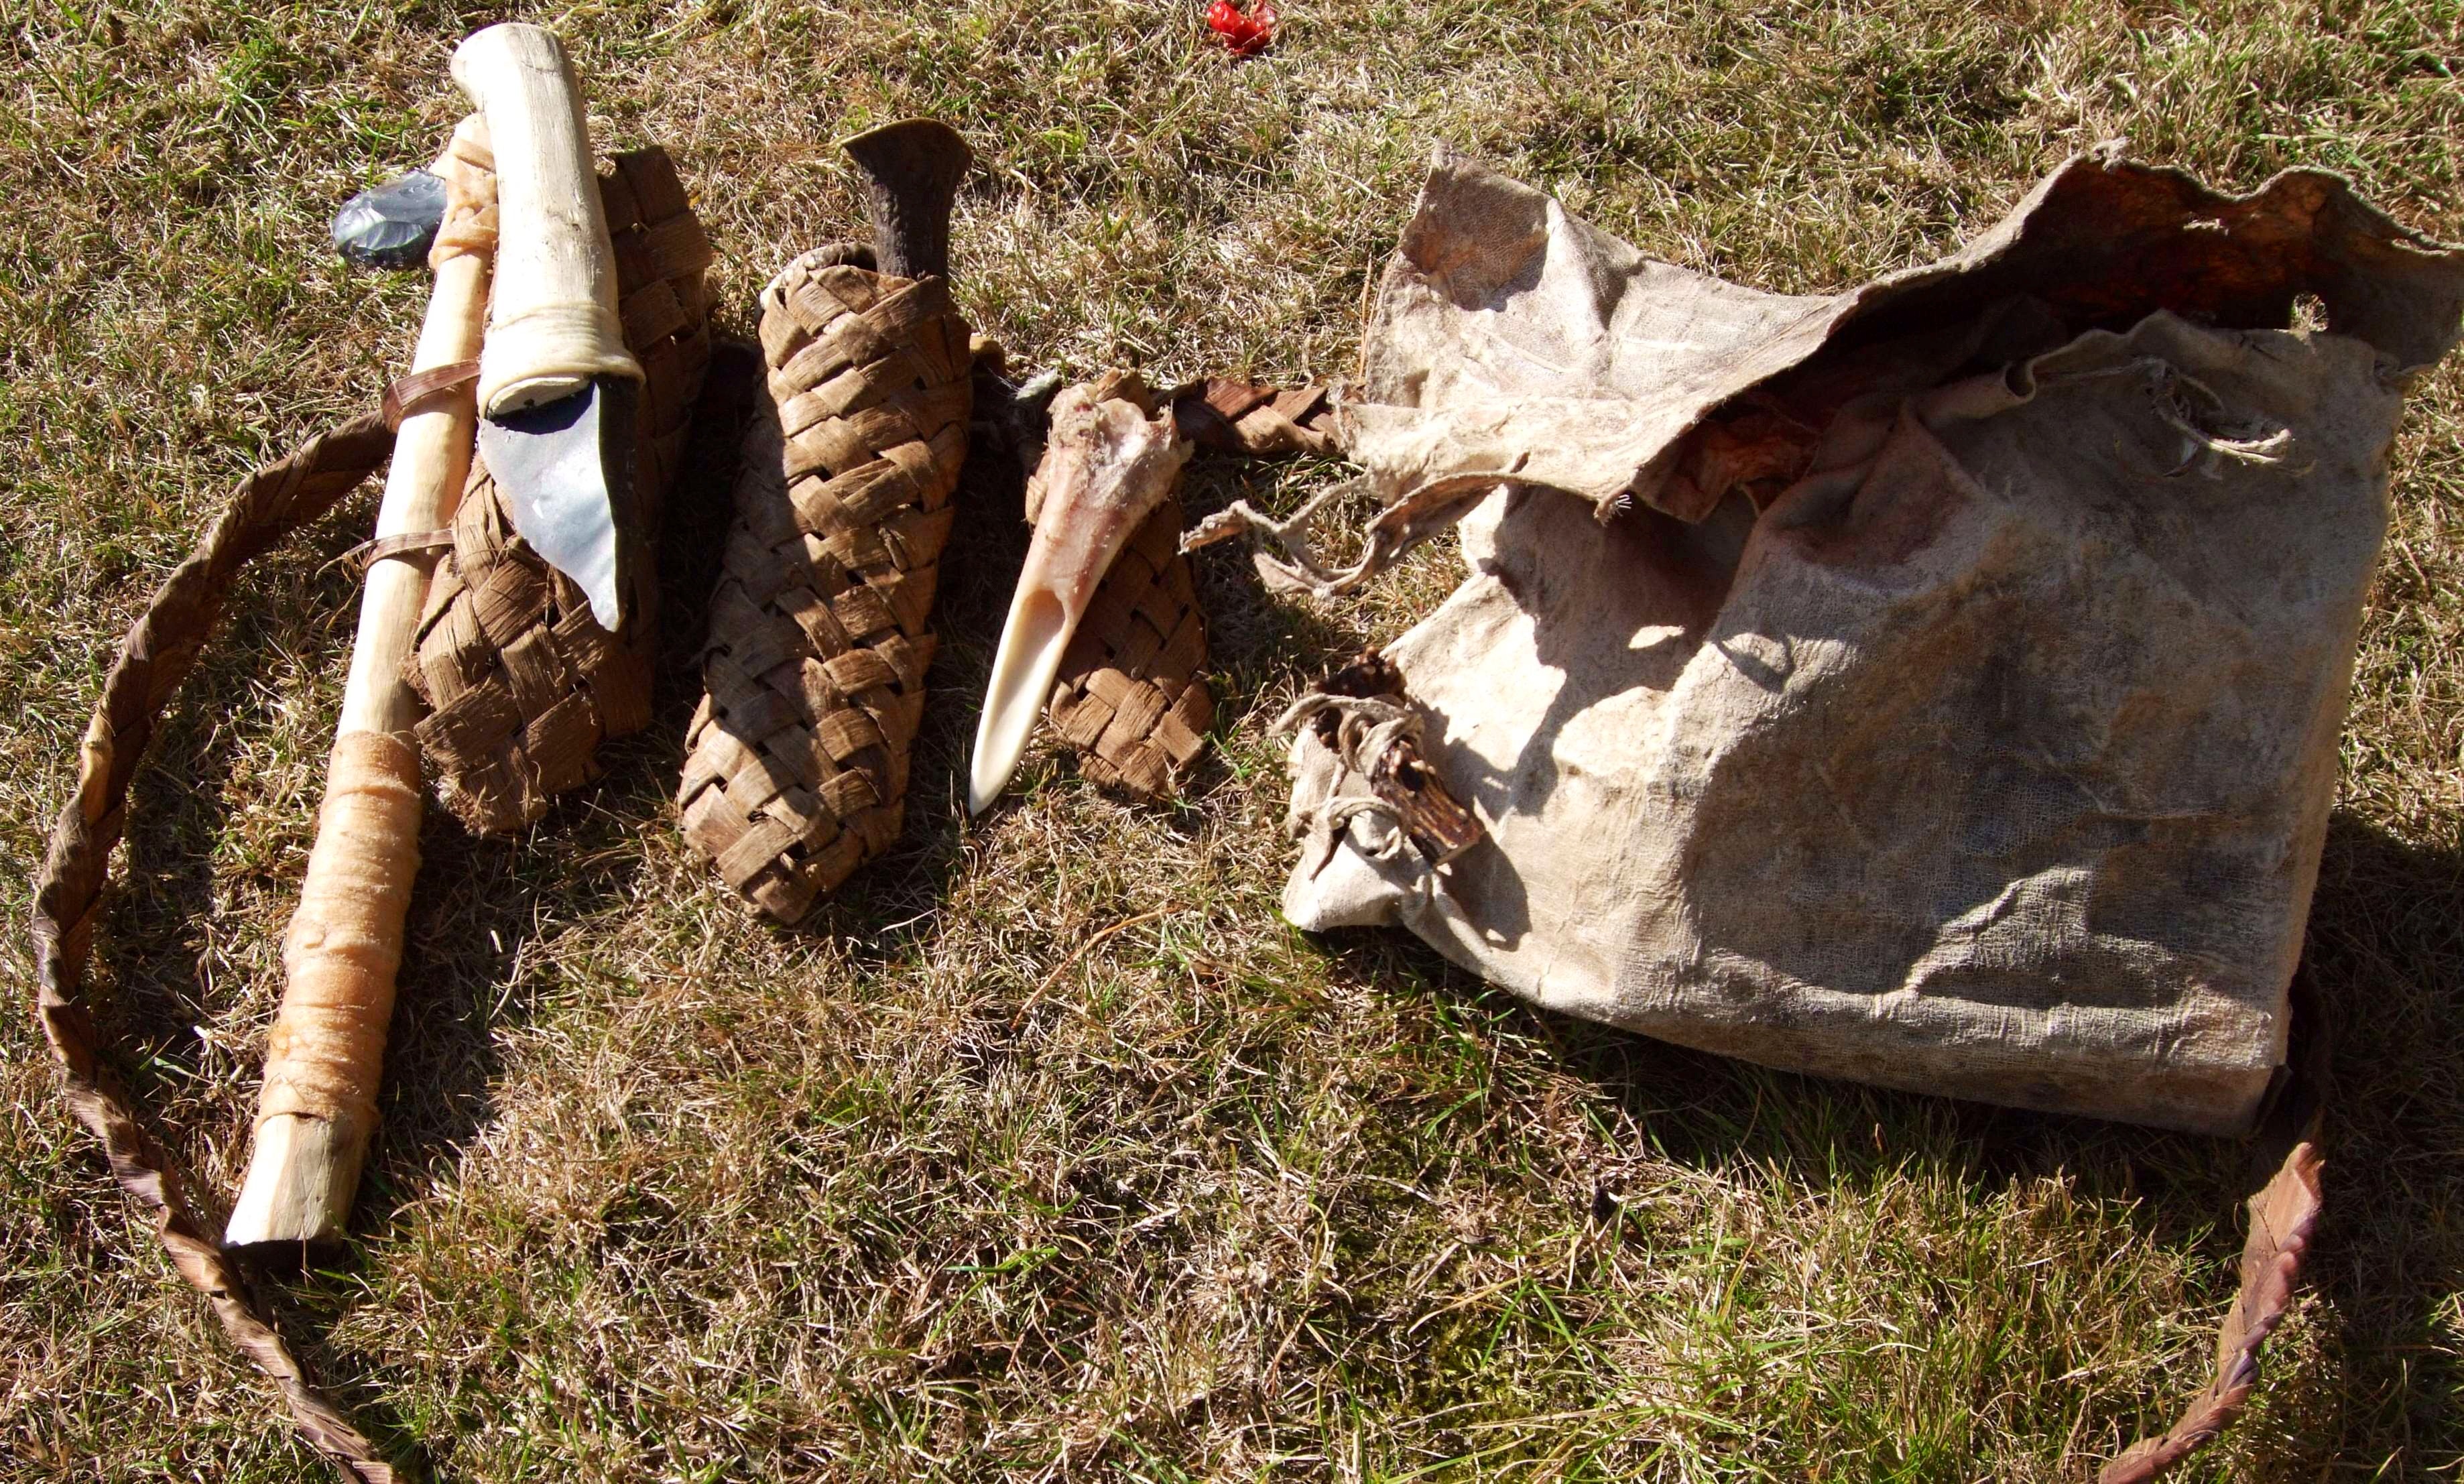
My final craft item was to make a bark sheath for the small bone bodkin you can see on the right. The knife allowed me to easily cut out many strips of bark in a very controlled manner so that the strips were all of the same width. I added a wrap of rawhide at this stage to protect the pitch and sinew from general wear and tear.

When I was finishing the sheath I found the knife edge was brilliant for trimming off all the excess bark.
Finally, to hang the sheath on my bark belt I cut up lots of buckskin with the knife to make some rough cordage.
Since the course I have used the knife on a few other projects. So long as I am respectful of the fragility of the flint edge, the knife has produced some wonderful results. It’s great for scoring lines in bark, shaving pieces of green wood down to points and for making rosette cuts in small branches to snap them.
When I was making my Split Stick Atlatl and had to batton open a piece of green wood I found that the thick back of the blade was able to withstand a lot of force from my wooden hammer, which was a pleasant surprise, although I was very nervous throughout the process.
Eventually I made the knife its own bark sheath and it now sits proudly as a well-used tool on my primitive belt order.
Cheers
George
Nice job, sir! Keep doing ya’ thing! And do not forget to share the skills with the ones you love! 🙂
Haha, battoning a flint knife. I bet the anti-battoning fanboys hate that picture. Now I have a good comeback next time someone wants to tell me how “abusive” I’m being to my STEEL knife.
Works for me and I batton with my steel knives all the time 🙂