For a while now I have been making Log Rocket Stoves in different ways.
The ones I make in the workshop are easy as all you require is a drill however if you make one in the woods things become more complex. A common theme about these woodland Log Rocket Stoves is that you need something like string or wire to hold everything together.
I thought about this a lot recently and came up with this adaptation of the Log Rocket Stove using green wood dovetail joints.
I will post a full step by step tutorial in the near future in my How To…. section.
Ok, I know it is supposed to be one picture every week however I thought I needed to zoom in on this one a bit more so I added another for detail.
Many of you know I love to tinker with log rocket stoves so today found me once again working on another design.
Dovetail Log Rocket Stove
I came across an old Swedish design for a log rocket called the Schwedenfeuer (Swedish fire) however like many other log rockets all the parts were held together with wire. As these stoves are supposed to date back to at least the middle ages they had to be held together with something else then.
I came up with the idea to use green wood wedges carved into the stove in a dovetail fashion. They worked perfectly, I got my coffee made and also a video (to follow). I will also be popping a How To…. blog post soon to show how to make one.
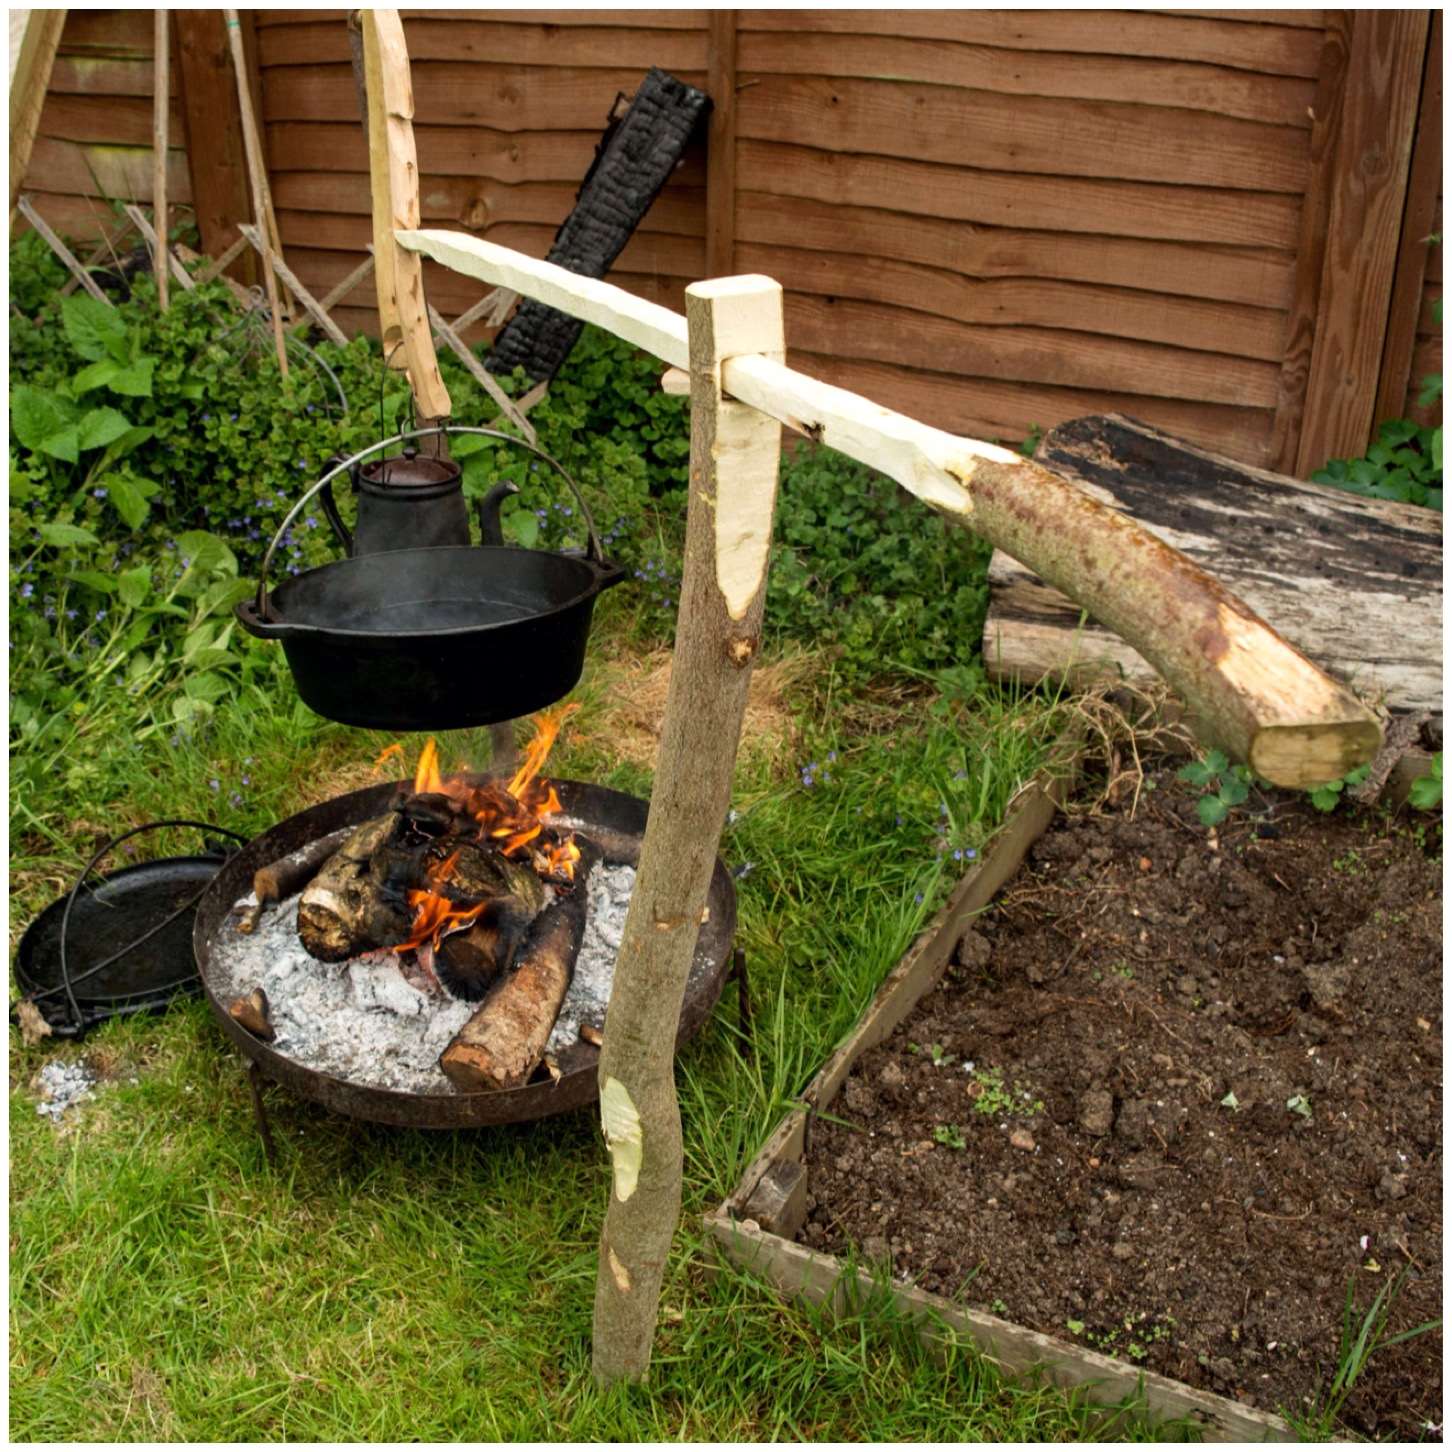
Sometimes you want an adjustable pot hook without a tripod set up.
Sometimes you want to pour your coffee without getting burnt by the flames.
If that’s what you want then build yourself a crane – It’s easy.
A robust and versatile campfire crane
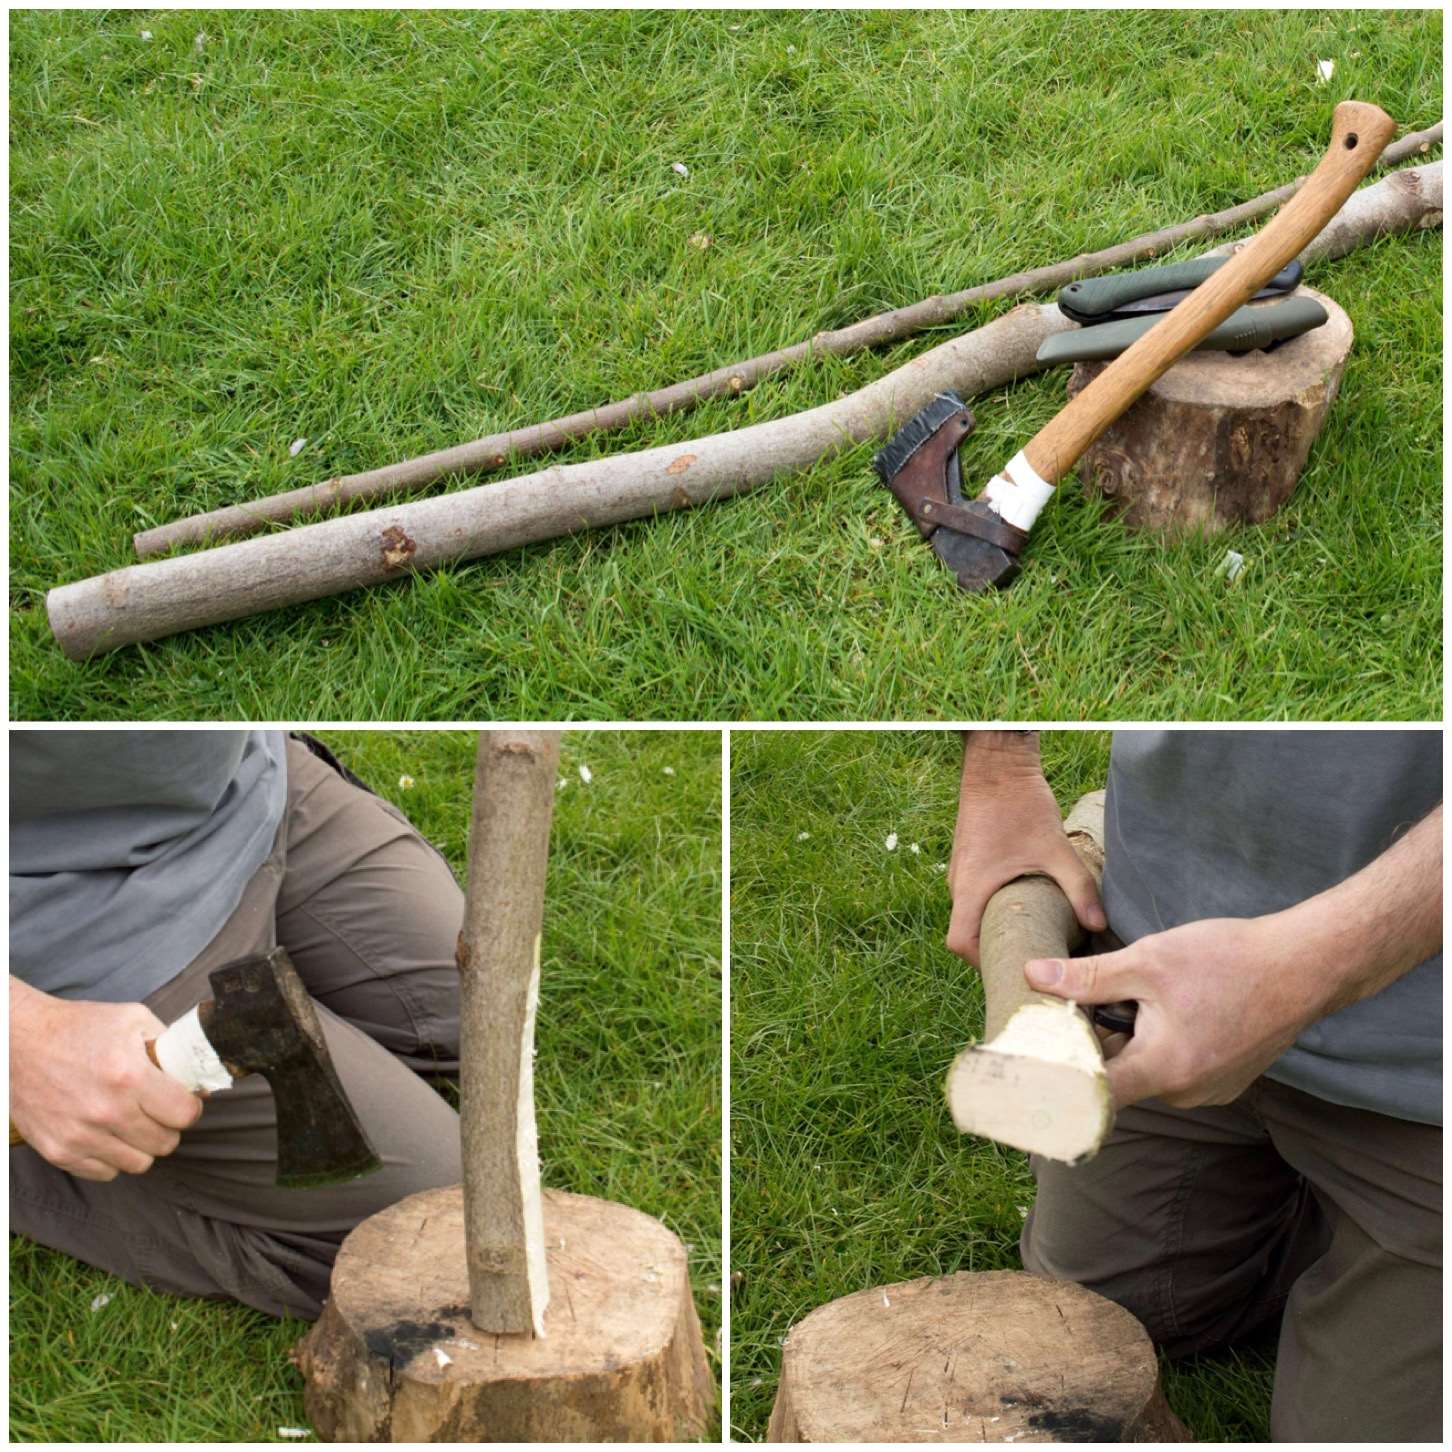
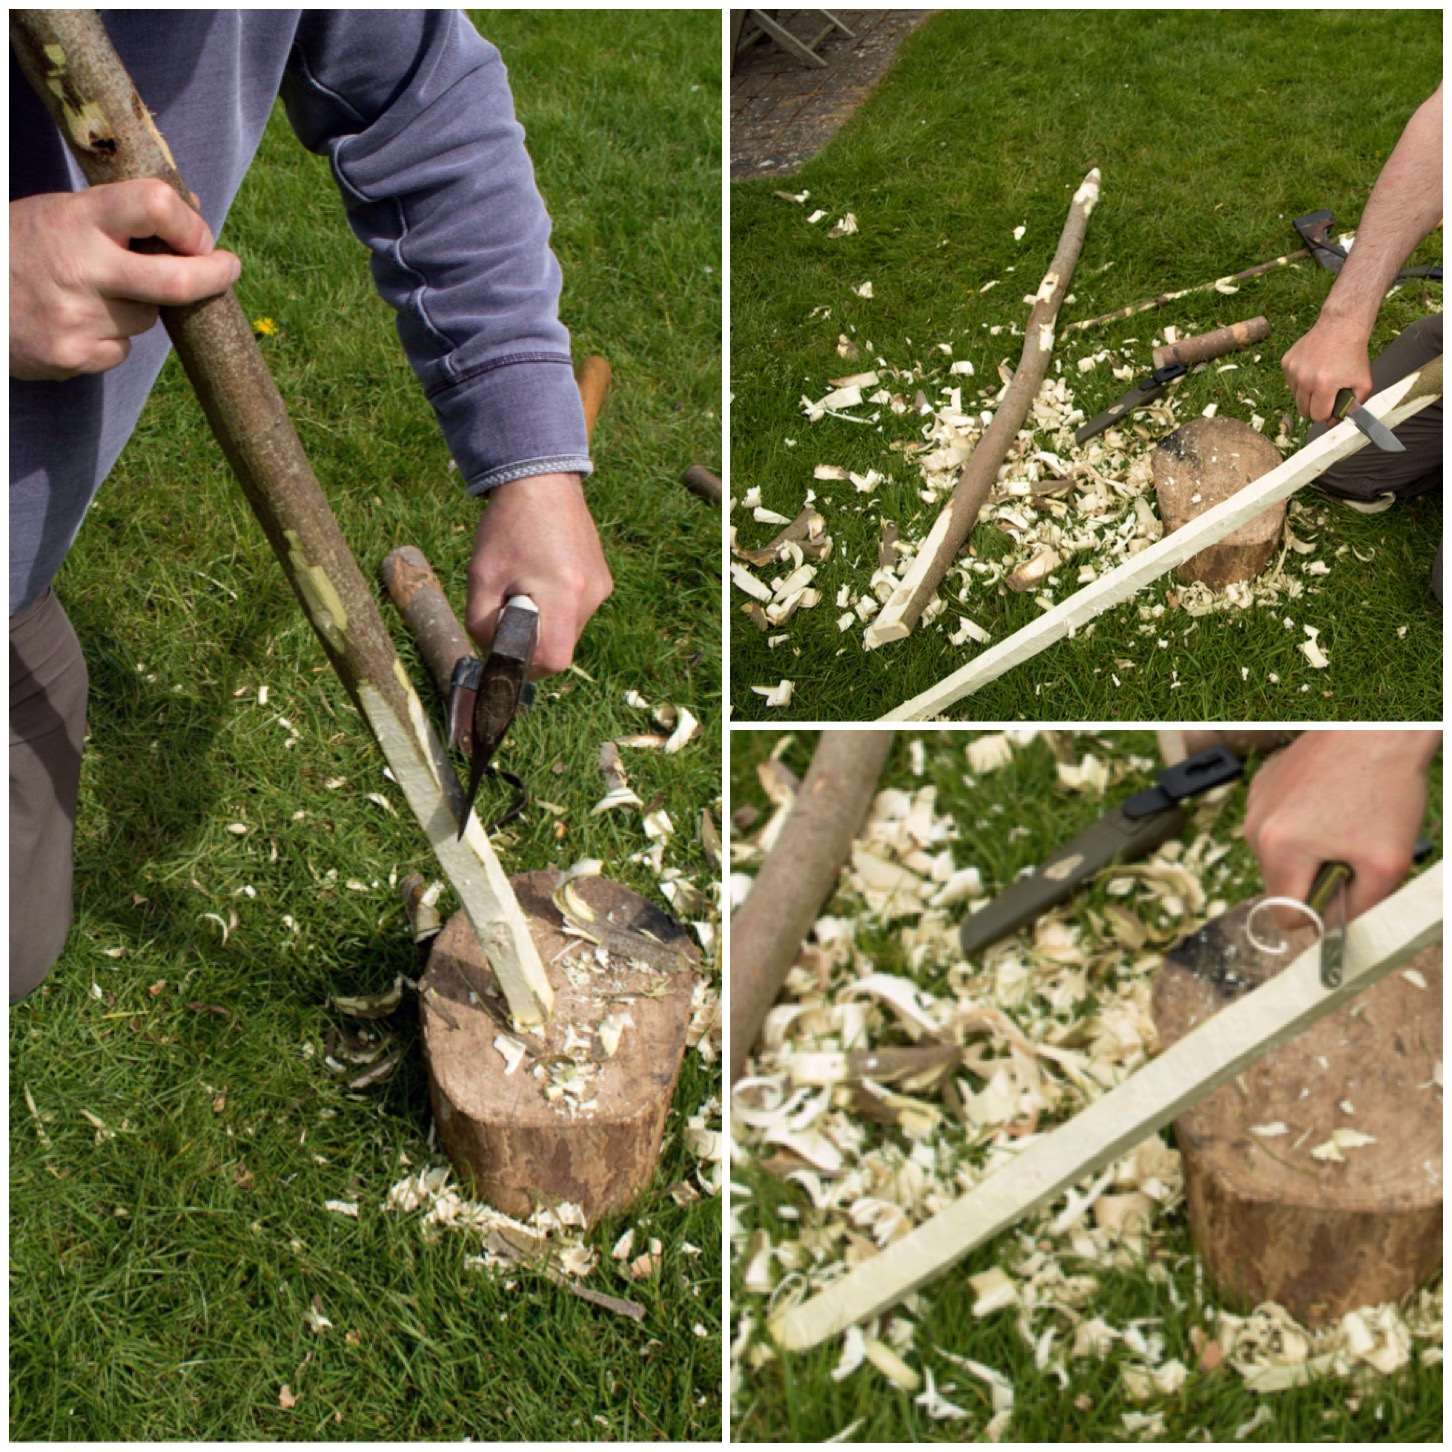
There are a number of different ways to build a crane set up however I decided to try just with the general tools I would carry in my rucksack. These included an axe, a saw and a general bushcraft knife.
The wood I used was some sycamore I had recently polarded in my garden. The crane is made up of a thick upright and smaller pieces to act as the arms. I decided to make two different types of arms, one for small pots and one for bigger Dutch oven type pots.
Sizes and dimensions will vary depending on how high you want your crane to be and what weight you want it to hold.
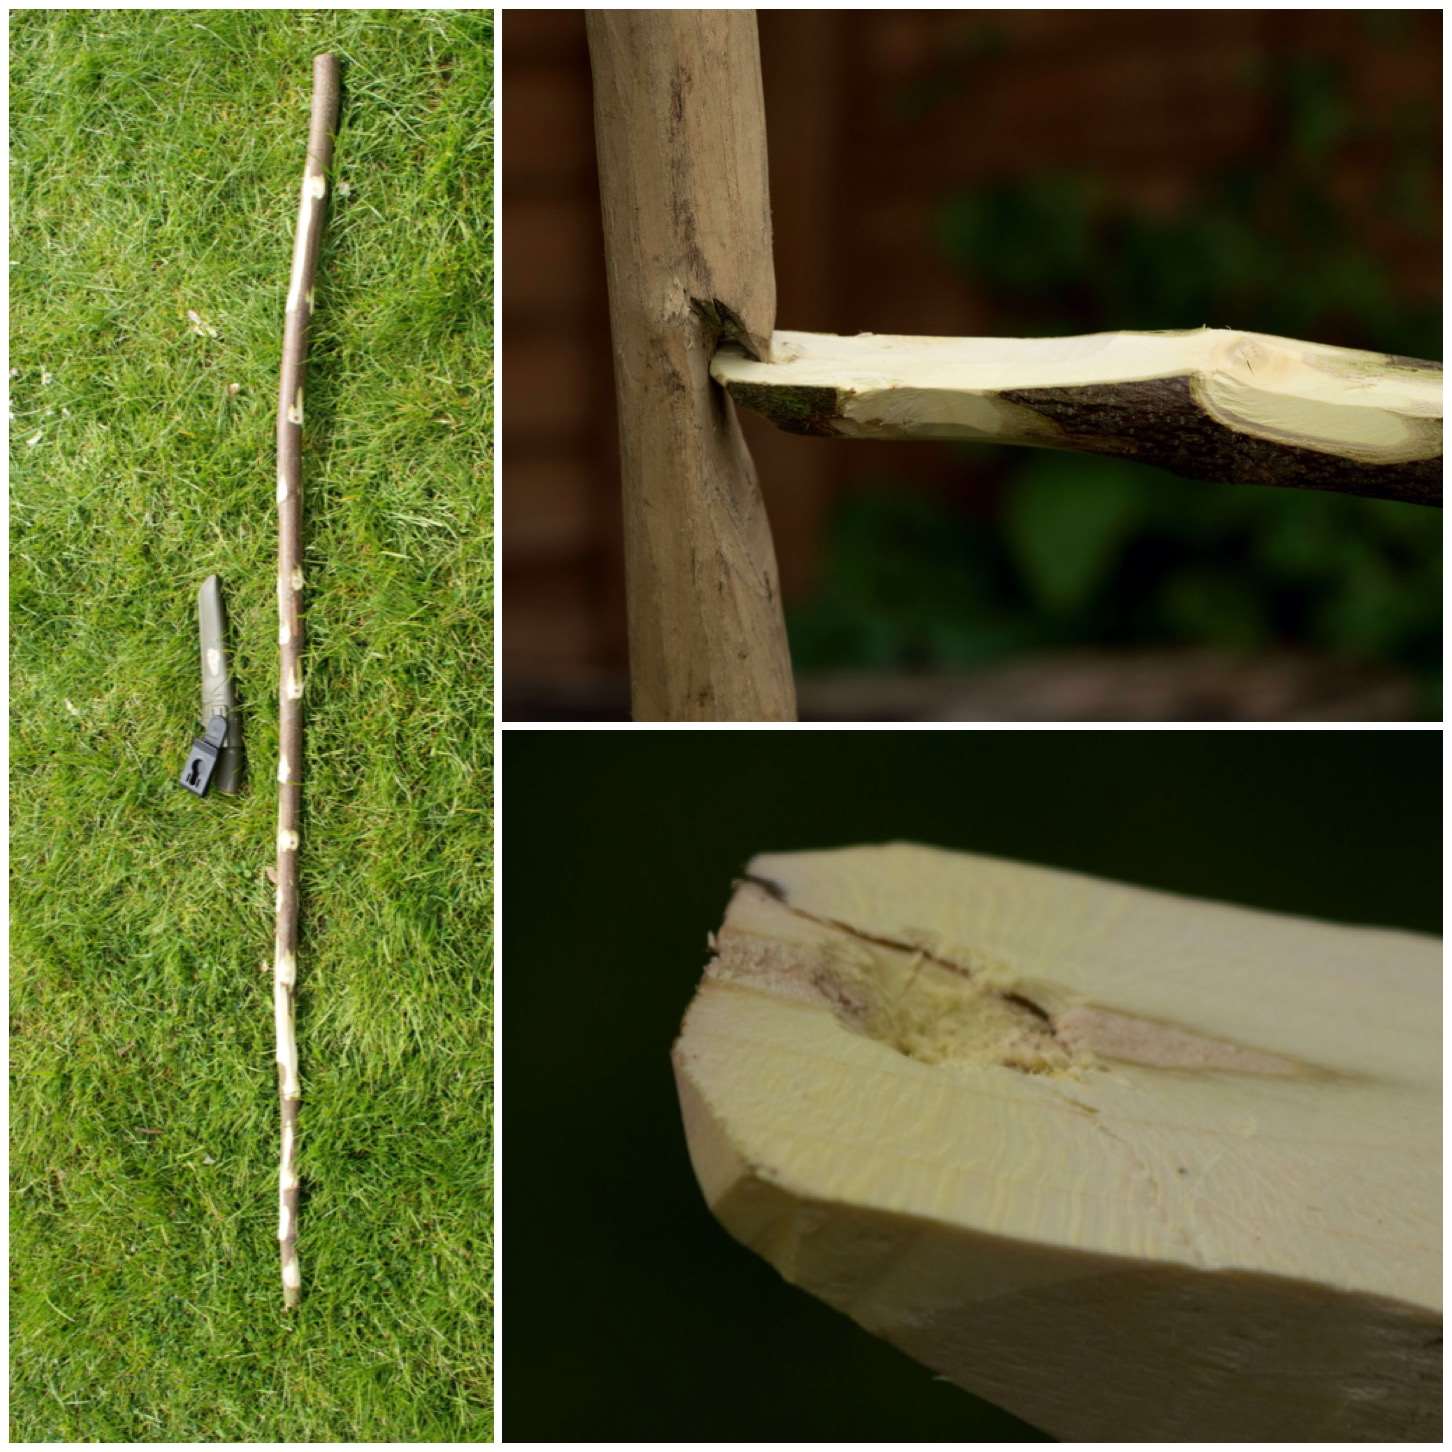
Carving the upright
I decided which part of the upright would be the top and then flattened it to give me a working area. You do not need to do this however I find it gives me a stable working surface. You can see in the pictures below that the girth of the upright is just larger than my hand as my fingers do not fully close around it.
Basic parts and flattening the top of the uprght
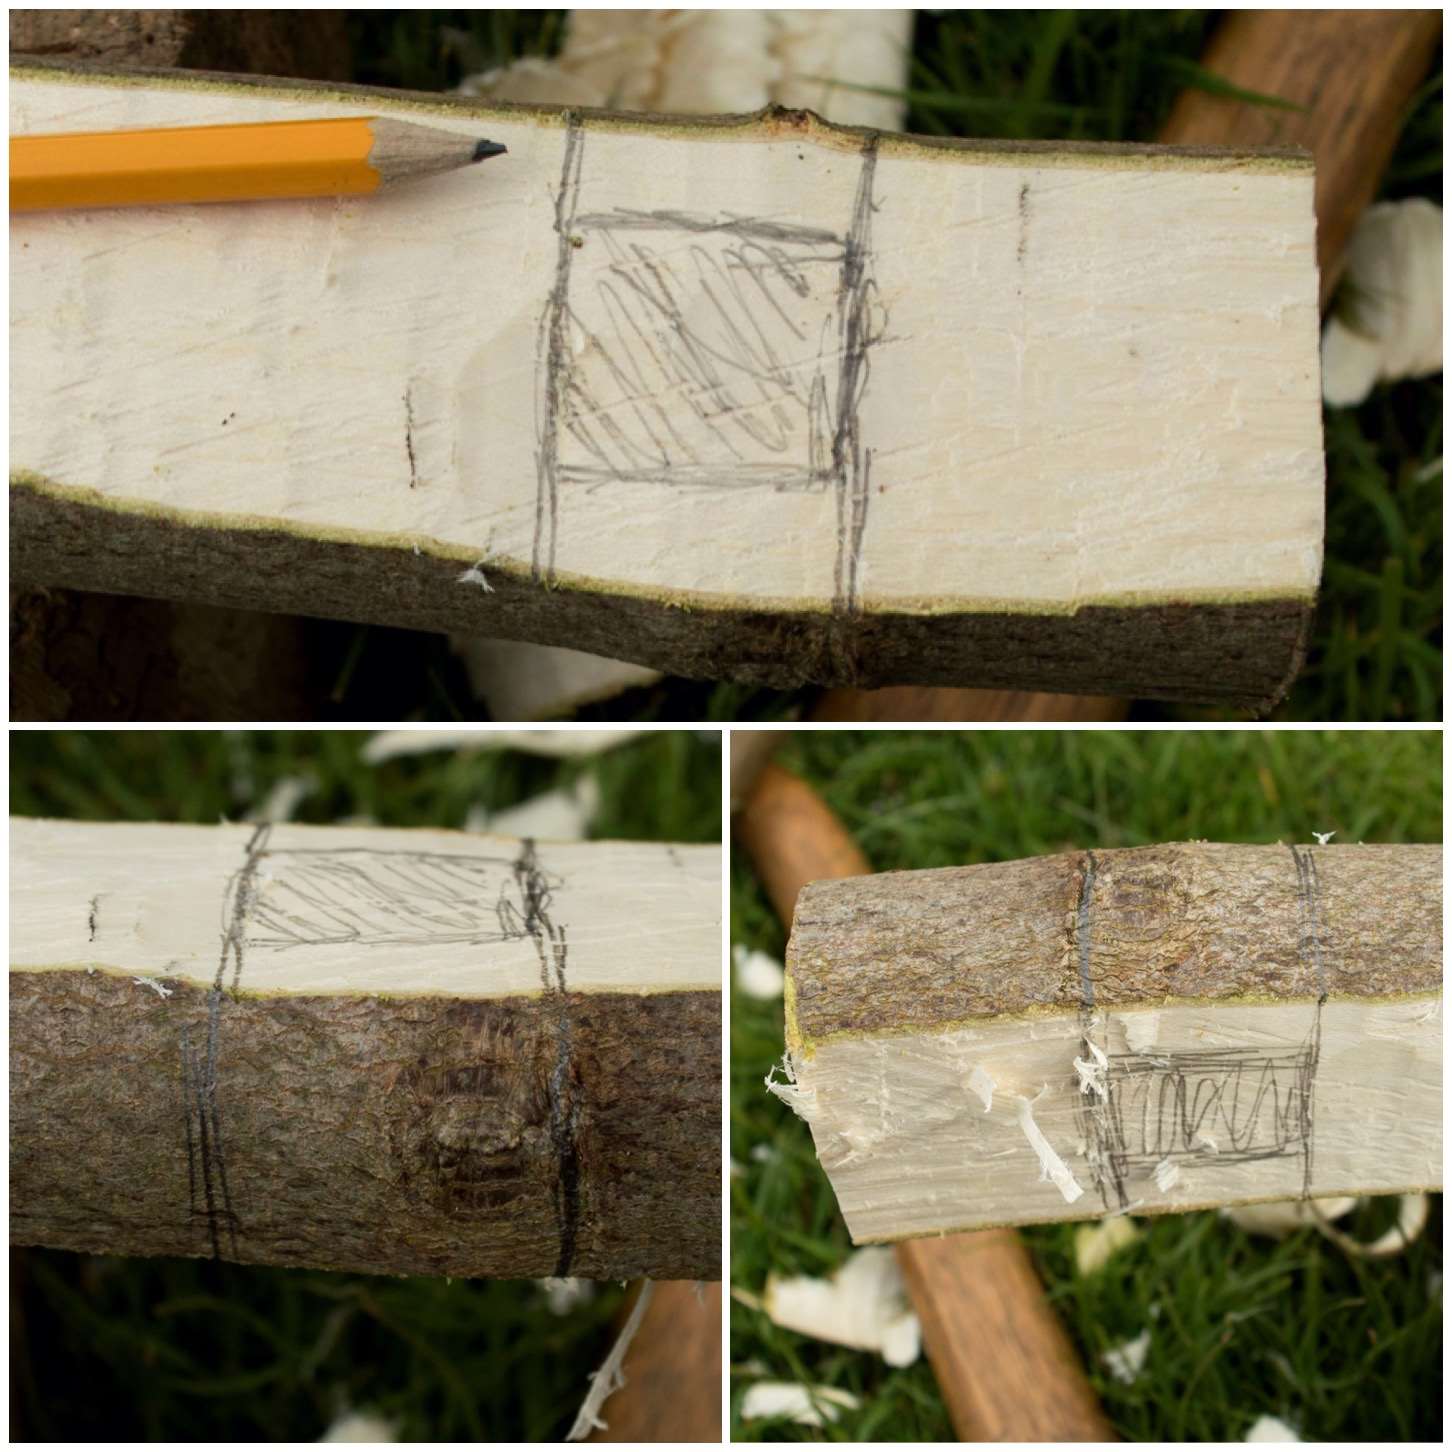
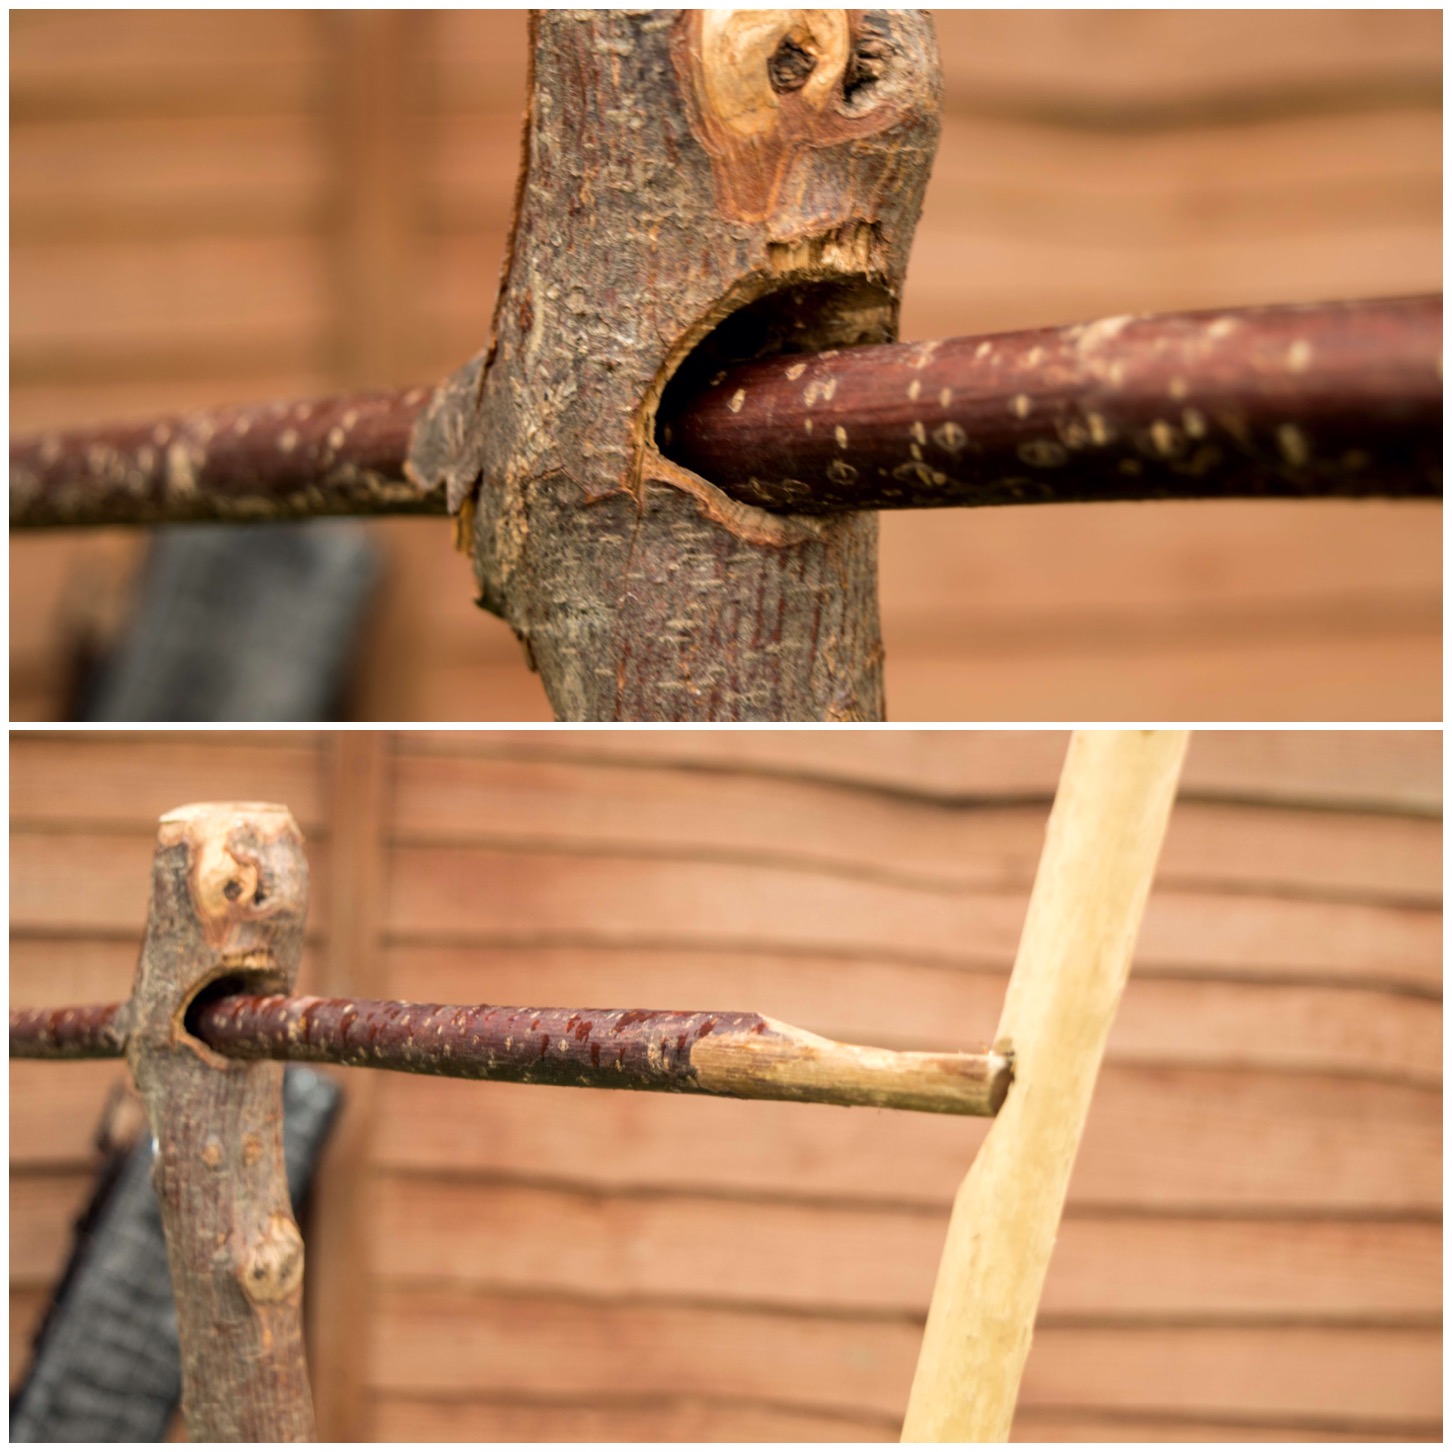
For the crane to work you need a hole at the top of the upright. The size of the hole will depend on the size of the arm you will put through it and how much wood you want left around the hole for strength.
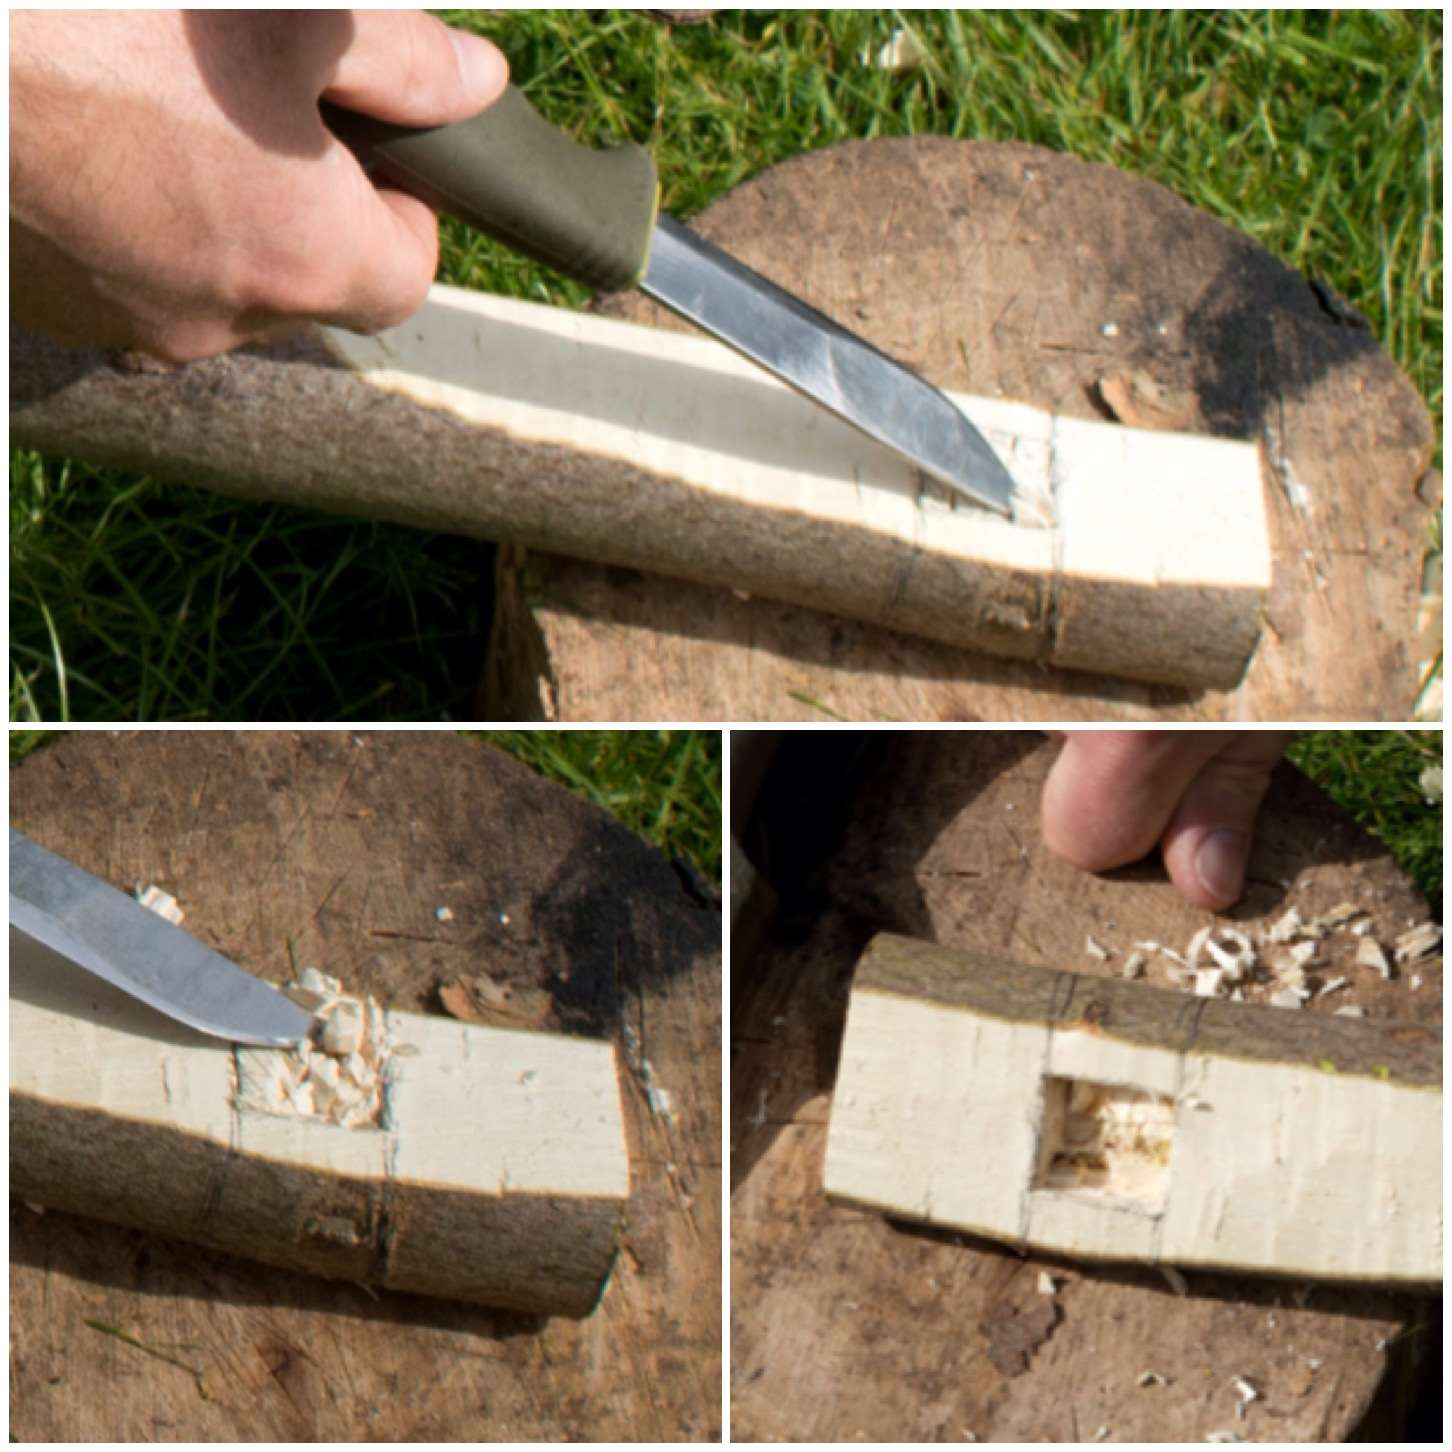
As I was going to carve this with my knife I opted for a square hole as this style is easier for me to carve. Once I had pencilled out one side I marked up the opposite side. In this crane I made the hole at 90 degrees to the upright (makes life easy) but you can angle it if you want so that the arm will be pointing upwards more when inserted.
Marking out the socket
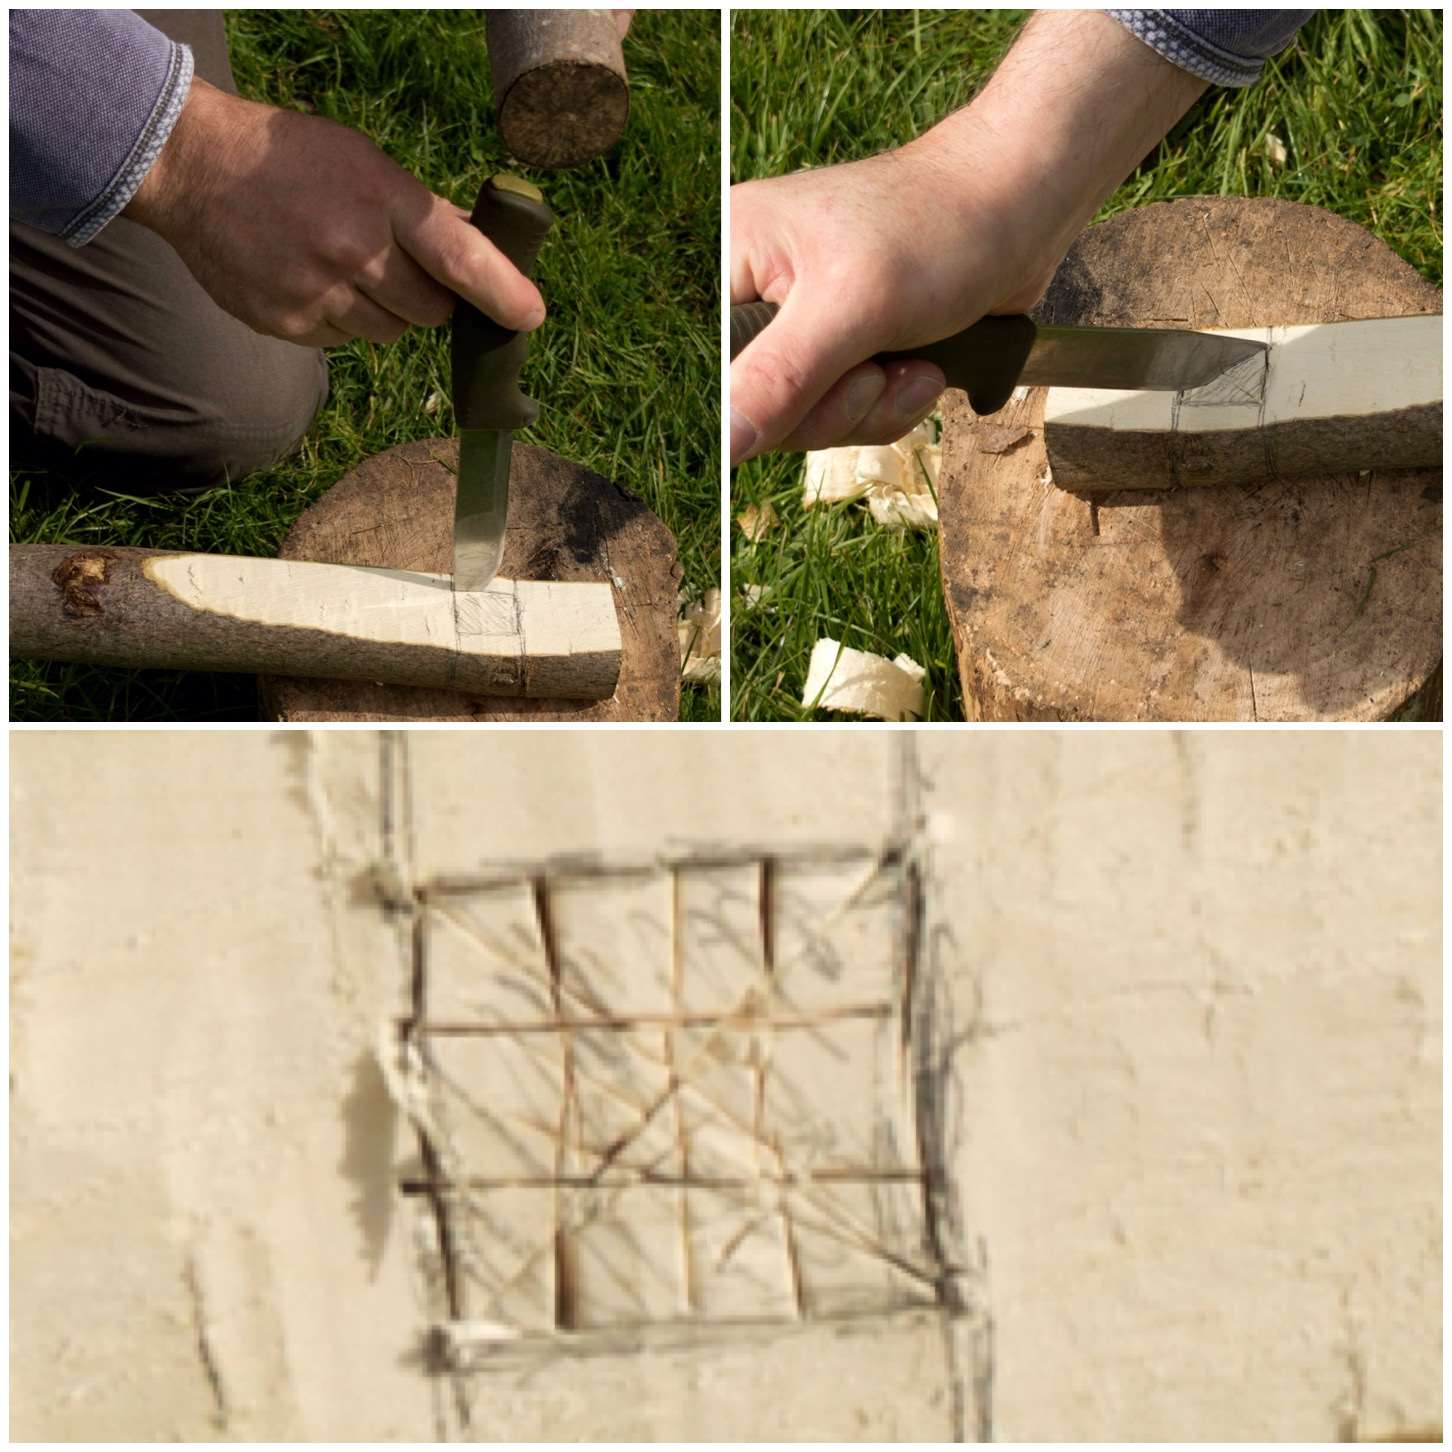
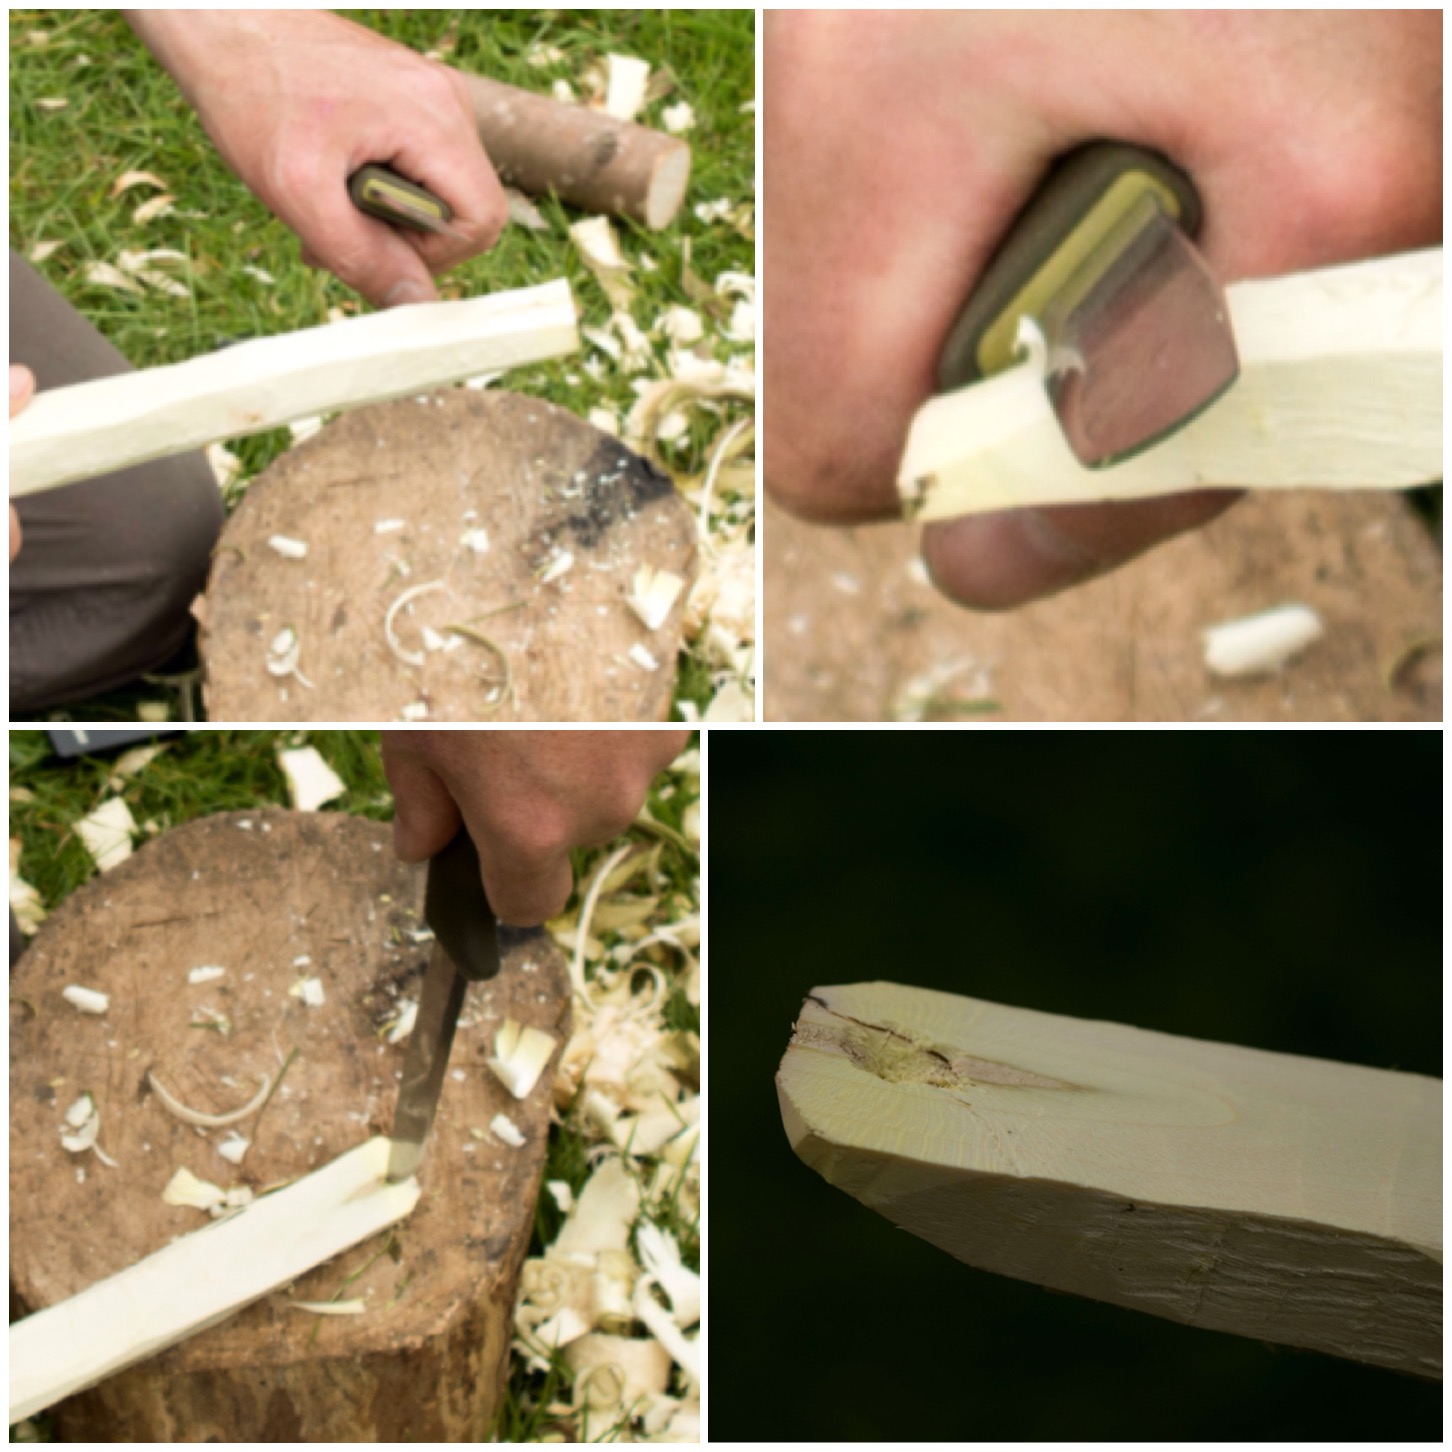
I used my knife to score lines into the wood I wanted to remove. You can do this by gently tapping your knife handle with a batton or rolling the curved part of the blade. You need to do this gently so as not to cause unwanted splits in the wood. Also make sure that the work piece is secure on the ground and that your free hand (if not battoning) is well clear of the knife edge.
Scoring
To remove the wood I just pushed the tip of my knife inbetween the scores and prised it out. Again I did this gently alternating between pushing on the handle with my hand or doing light taps with a batton. When I twisted the point I did so gently so as to not cause any unwanted splits or worse still – snap off the tip of my blade.
I did another set of scores and chipping until I was about halfway through the upright.
Chipping
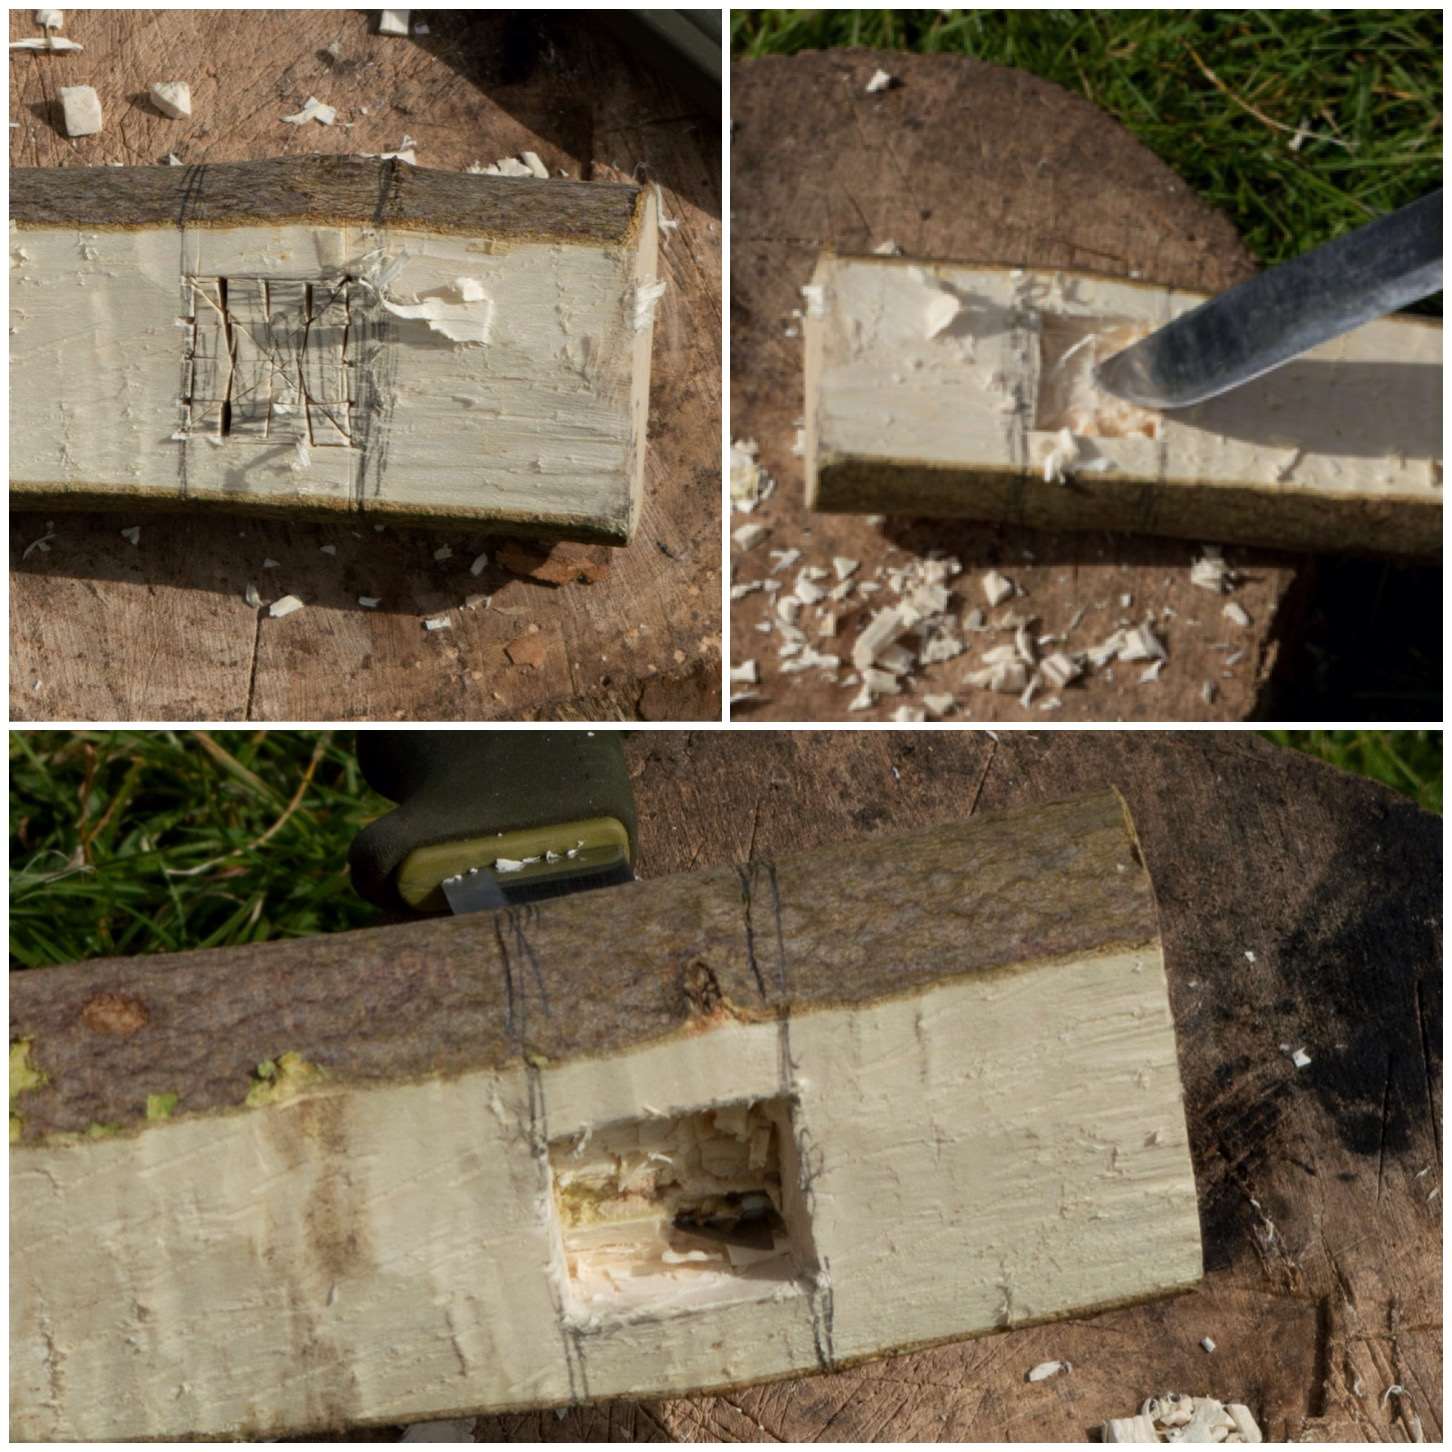
I then repeated the exact same procedure on the other side until my knife popped through the other side.
Repeating the scoring and chipping
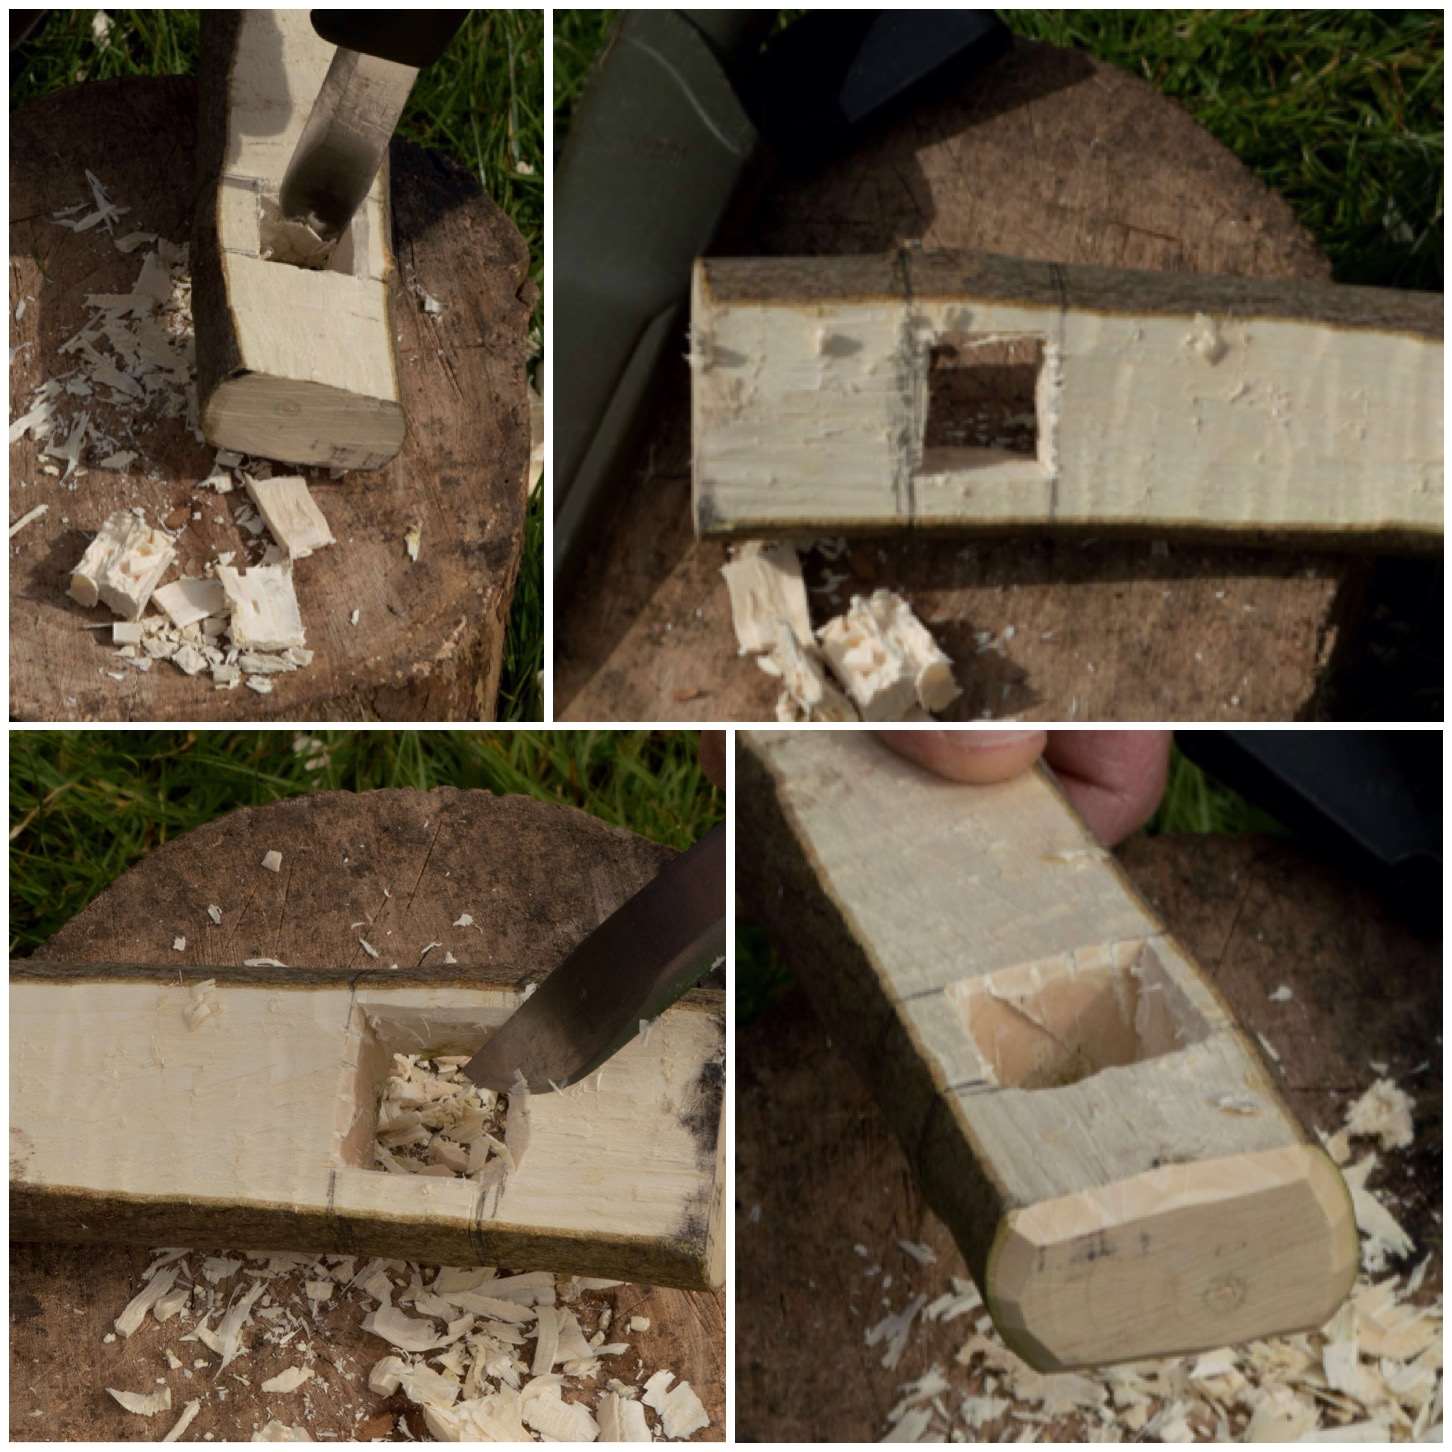
Once the plug of wood was removed I trimmed the internal walls of the hole (using the wood I would use as an arm as a guide) and chamfered the edges off.
Finishing the socket
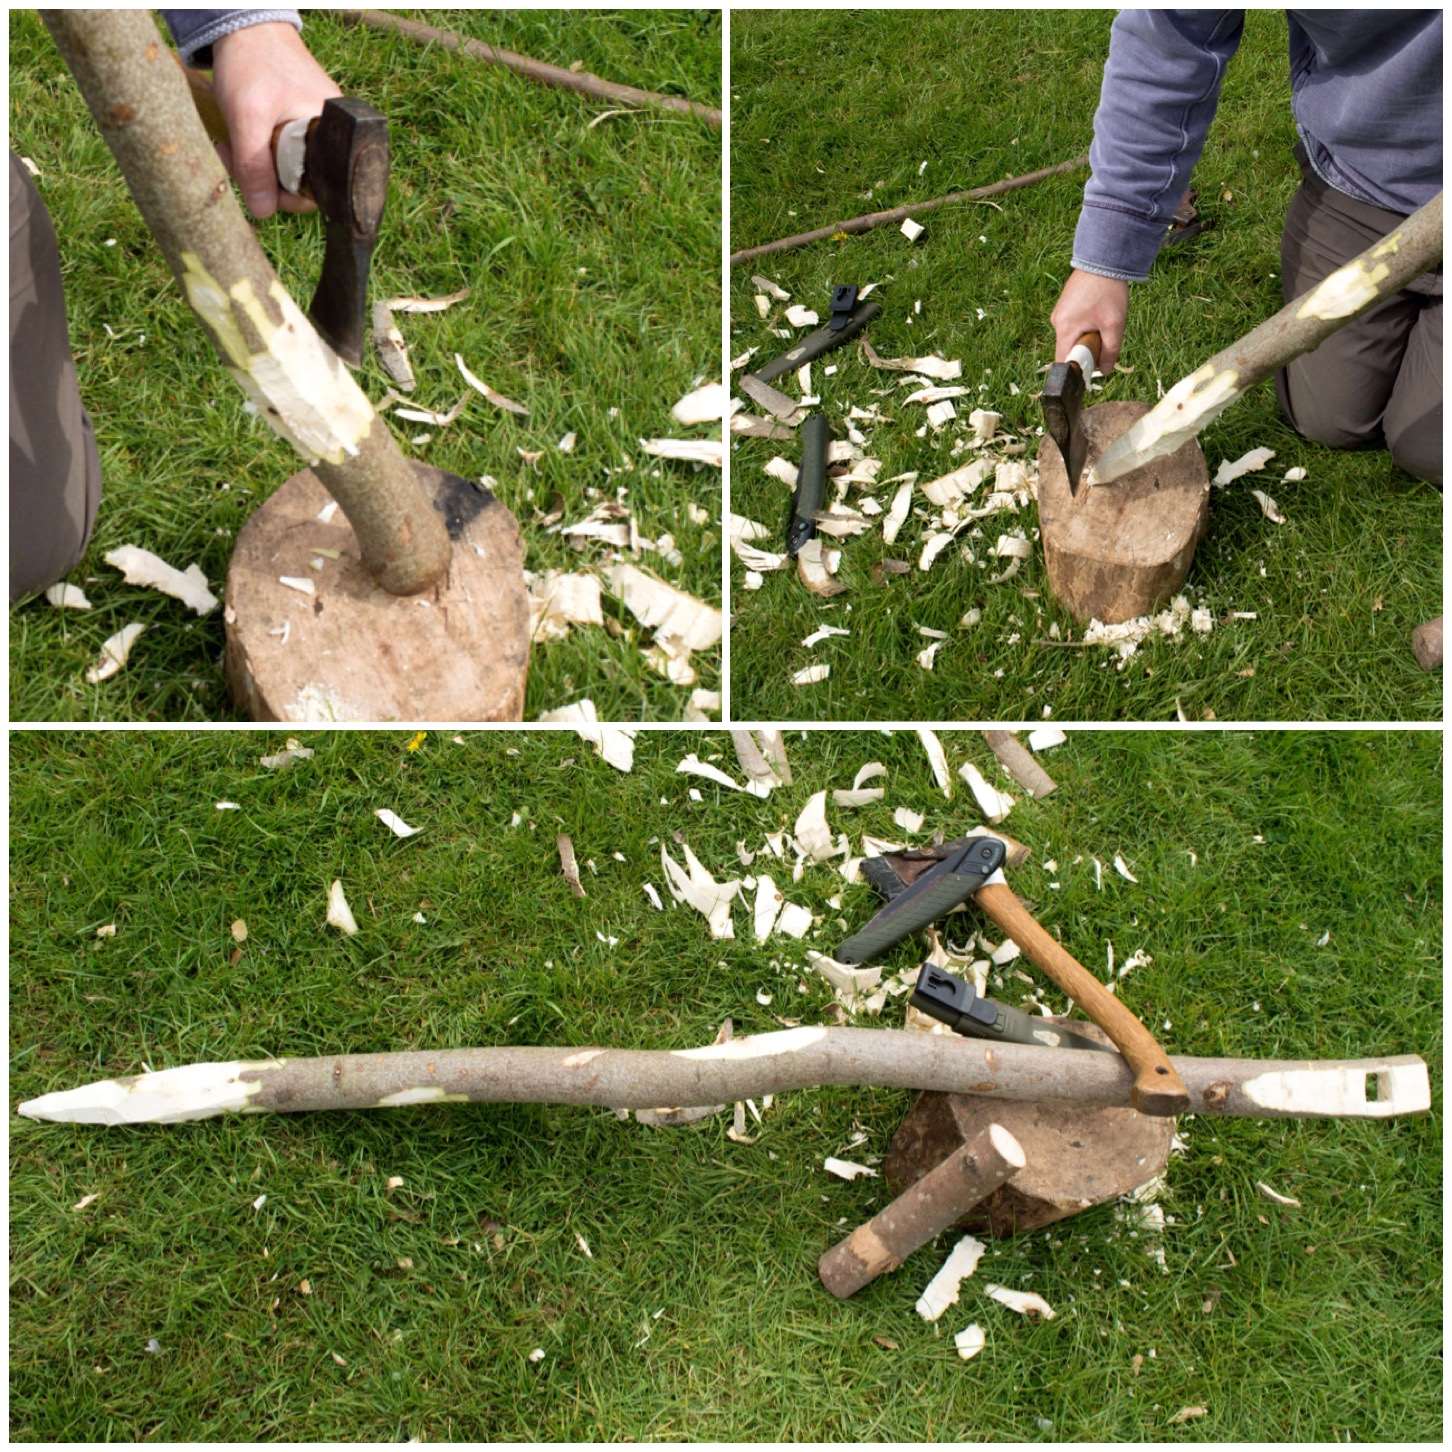
The upright was finished off with all the knobbly/sharp bits being removed and a point was axed out at the bottom of it.
Trimming and pointing
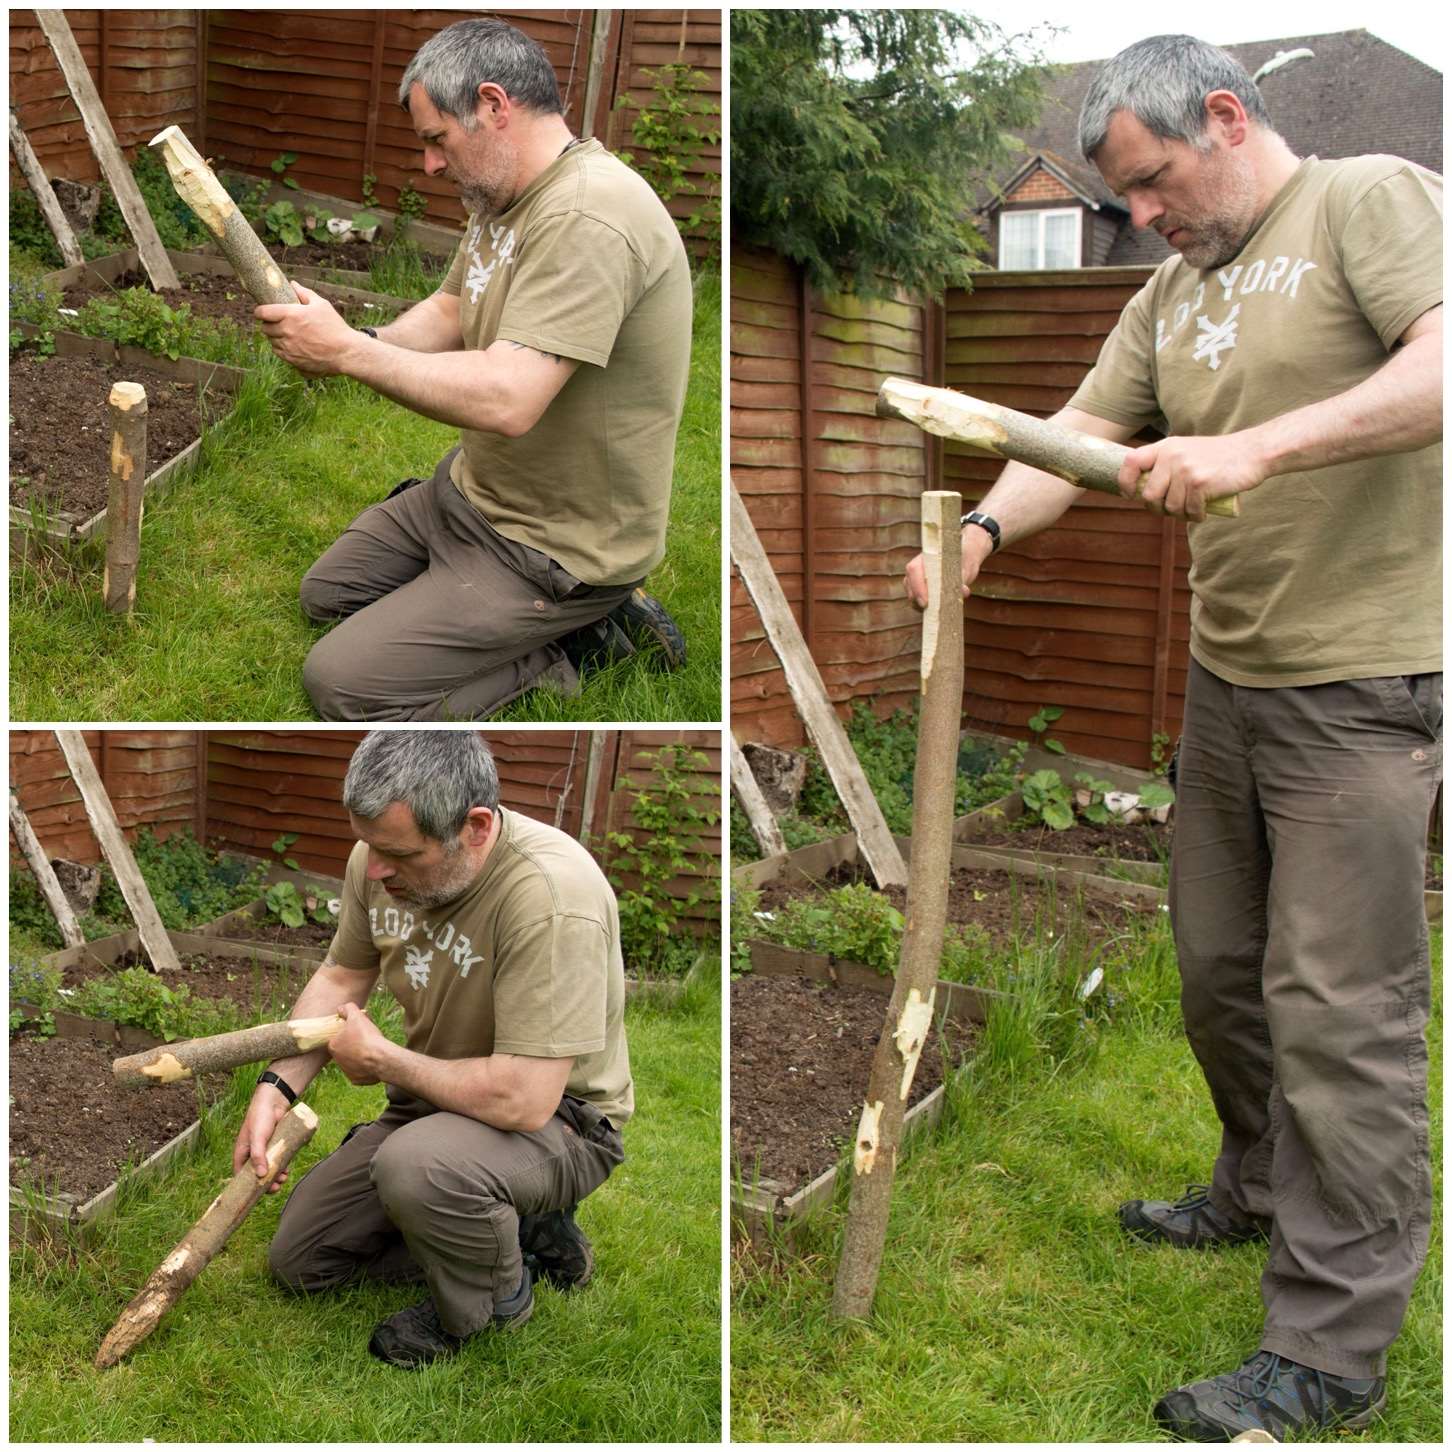
Carving the lightweight arm
I made the arm for the lightweight pots from a thin piece of sycamore. I trimmed a flattened piece near the end and carved a small dimple with the point of my knife in it.
The small dimple is needed to keep the adjustable pot hanger in place. I have covered the making of the making of an adjustable pot hook in my post How To…. Carve and use an Adjustable Pot Hanger.
Lightweight arm
Set up
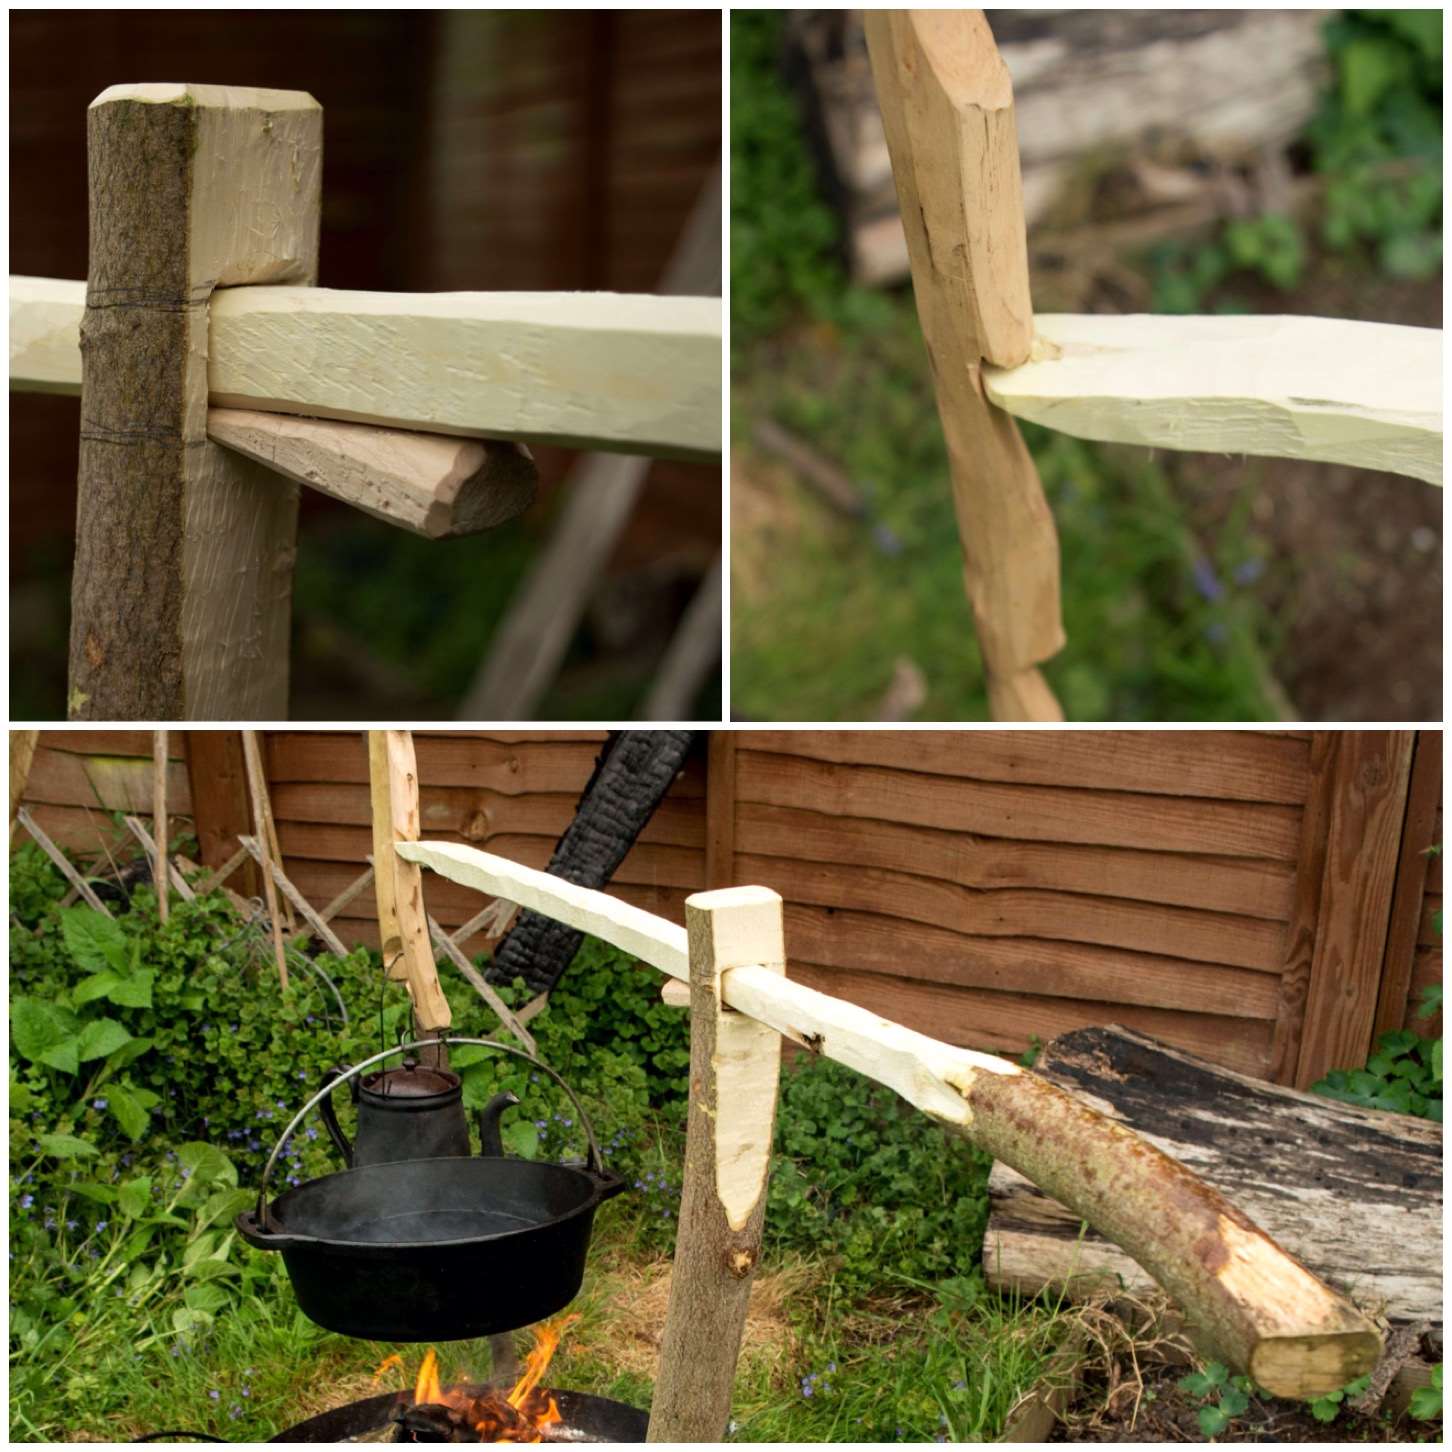
In my previous post on making a Double French Windlass Cooking Rig I explained how to make a pile driver. I used this pile driver to make a hole for the upright to sit in.
Once you have created the hole it is just a case of gently tapping the upright into place. If you did not use the pile driver you would need to hit the upright hard to drive it into the ground and very quickly the wood around the hole would crumple or snap.
Using the pile driver to place the upright
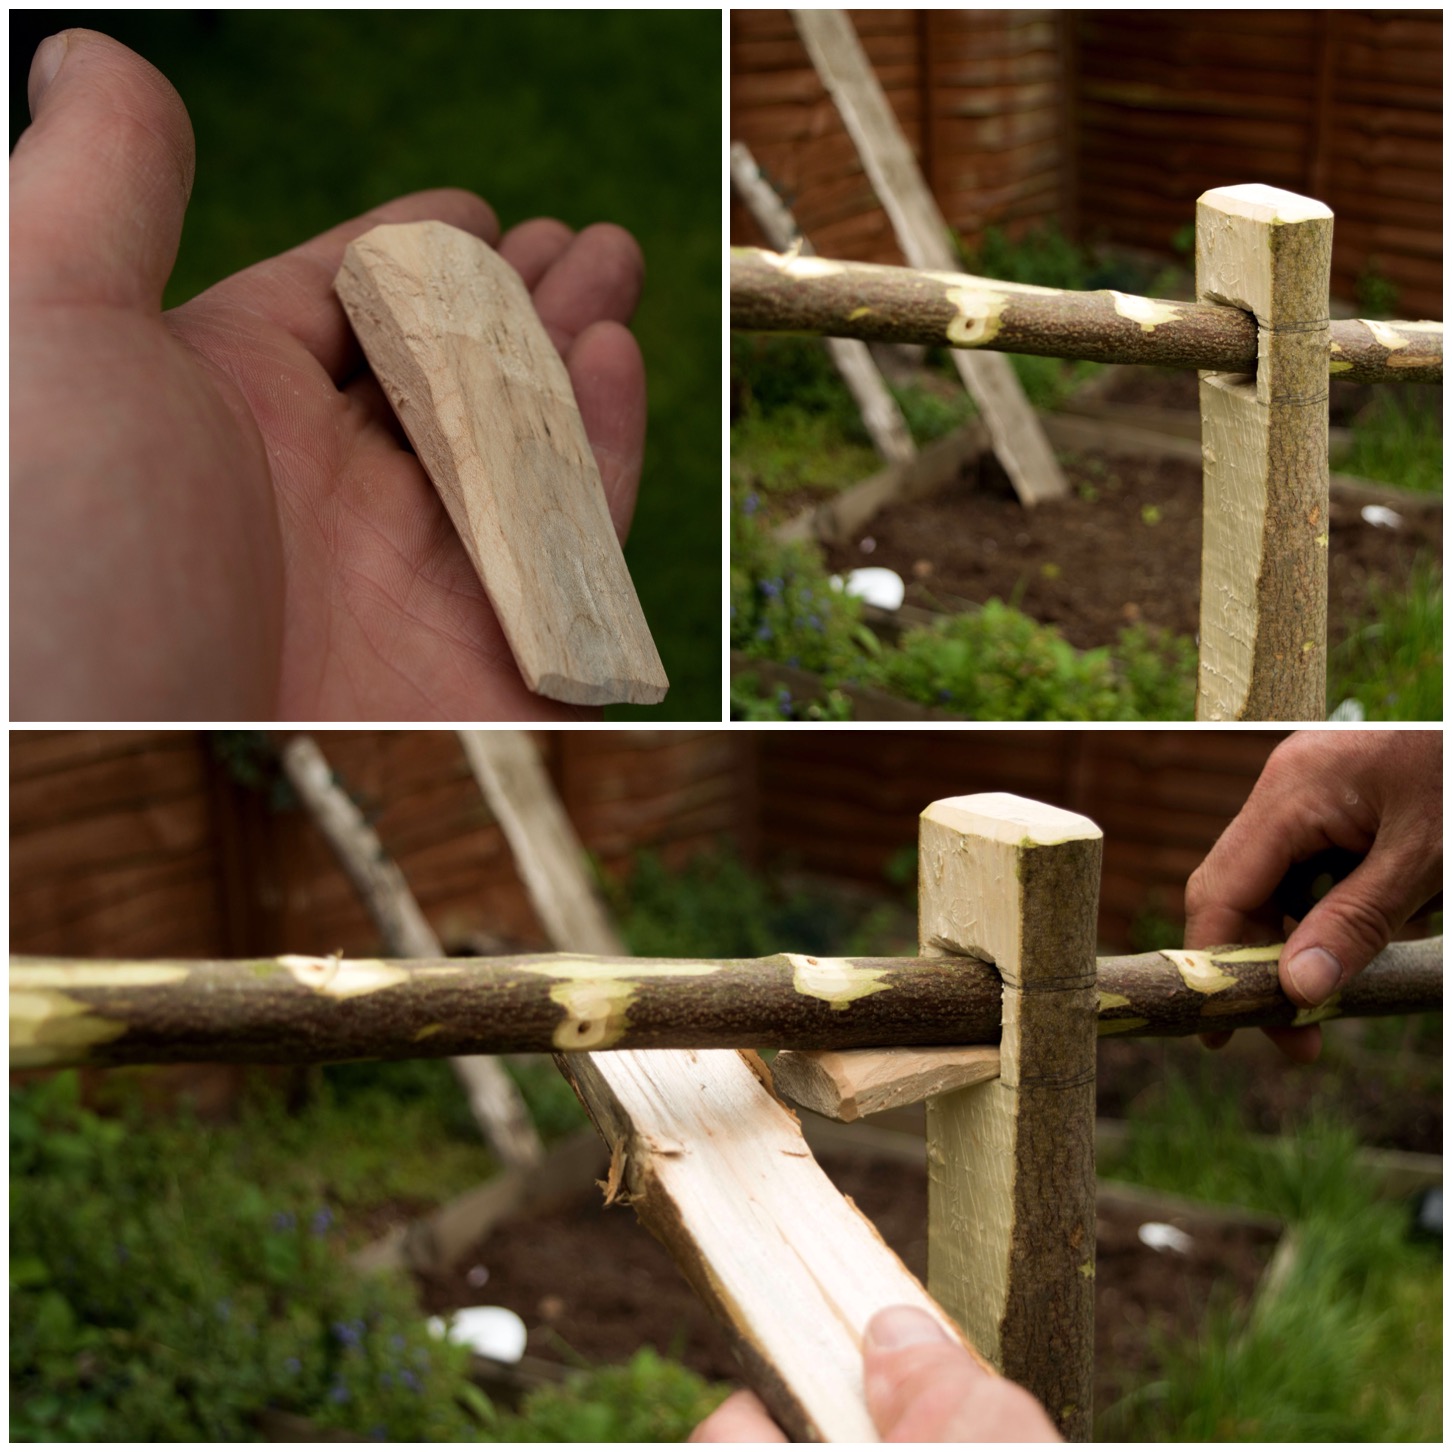
As I had not made the hole at an angle I carved a small wedge to hold the arm securely and also to raise the tip up slightly.
When the arm is in place in the hole just tap the wedge into place gently. Do not ram it in as this could cause undue pressure and split the wood.
Create a wedge to secure the arm
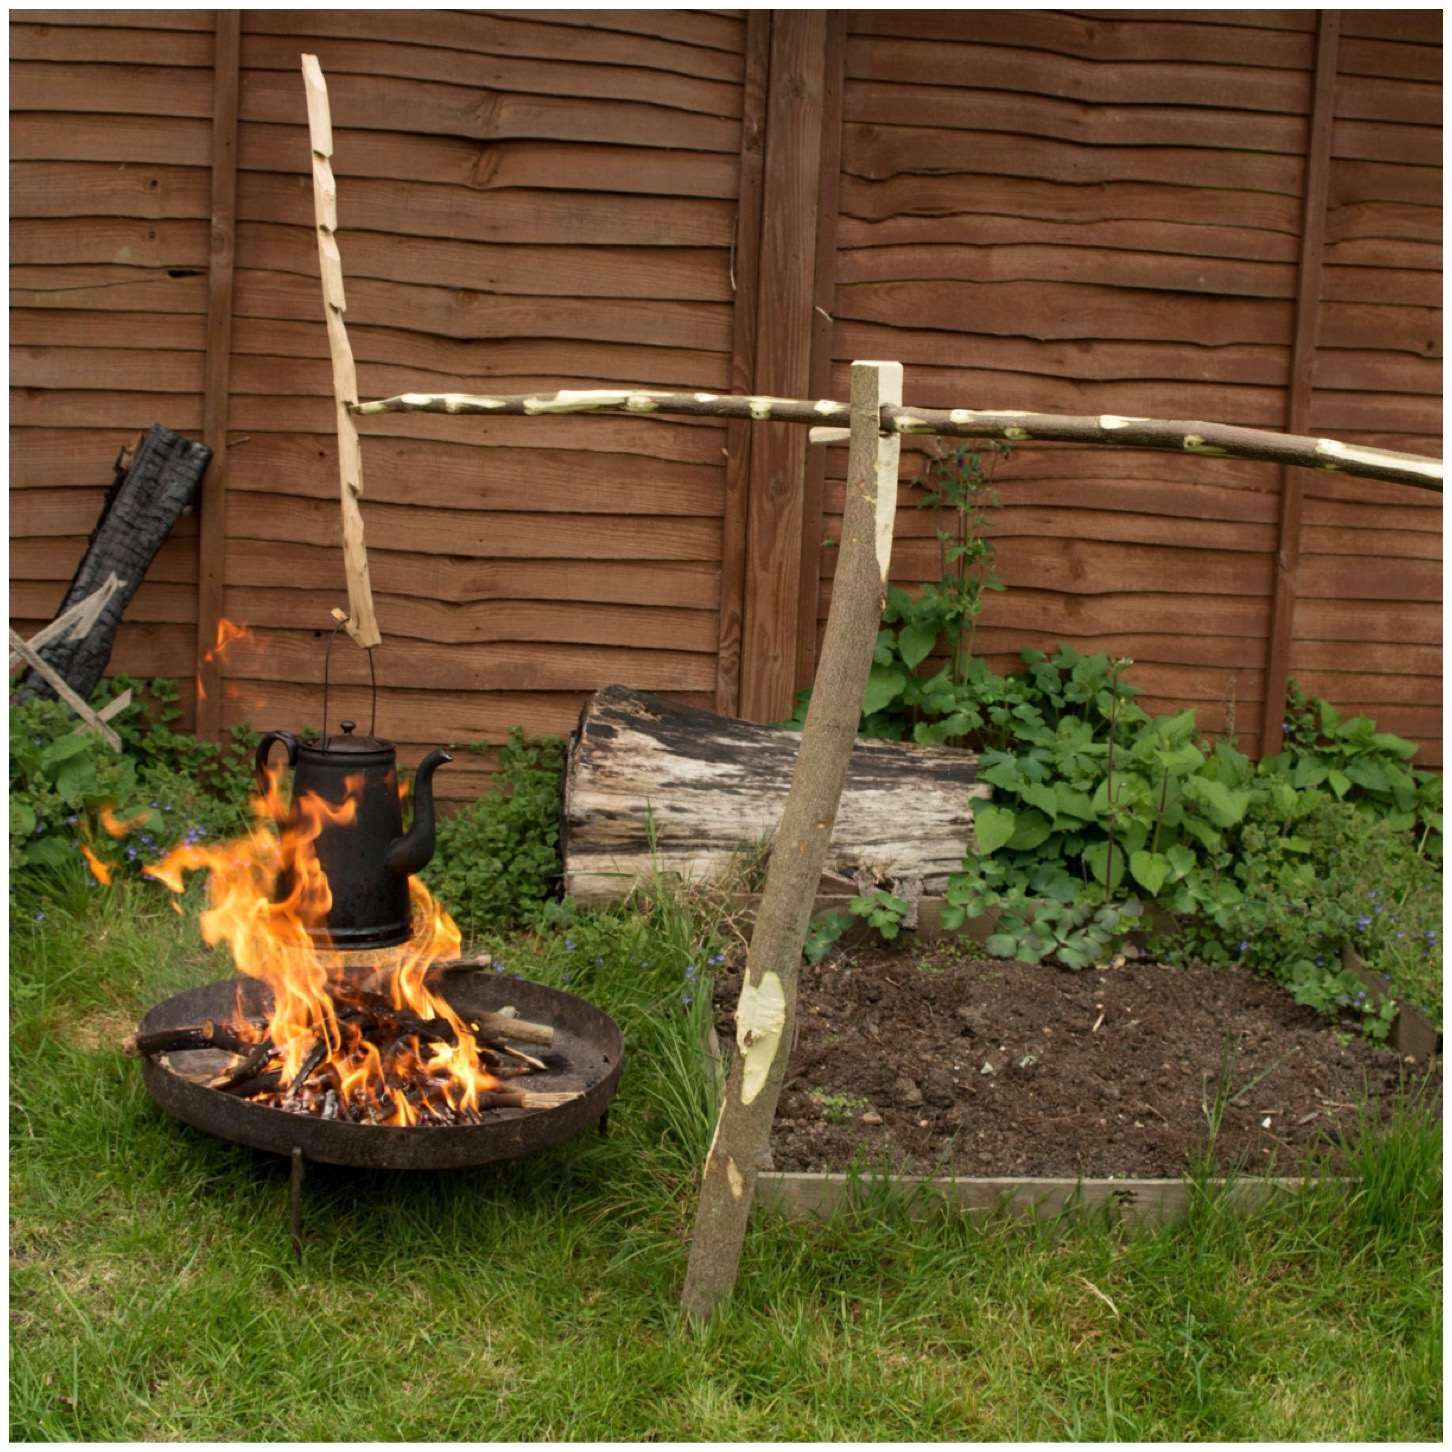
Then it is a simple case of attaching the hanger with your pot or kettle onto the arm.
I like this system as it is easy to adjust the height of the pot and the whole crane can be swivelled to move the pot away from the fire easily.
In the picture below I have left the back of the arm overly long but I will trim it shorter eventually.
Ready to go
Carving a strong arm
As I had made a square hole I got a bigger piece of sycamore and squared it off along its length to fit exactly in the hole. This arm was designed to take bigger pots like a dutch oven.
Creating the heavyweight arm
The end was shaped to fit the pot hanger.
Finishing the tip
Then set up exactly as the first arm.
This time though I tested it out with a dutch oven half full of water.
Heavy Duty Cooking
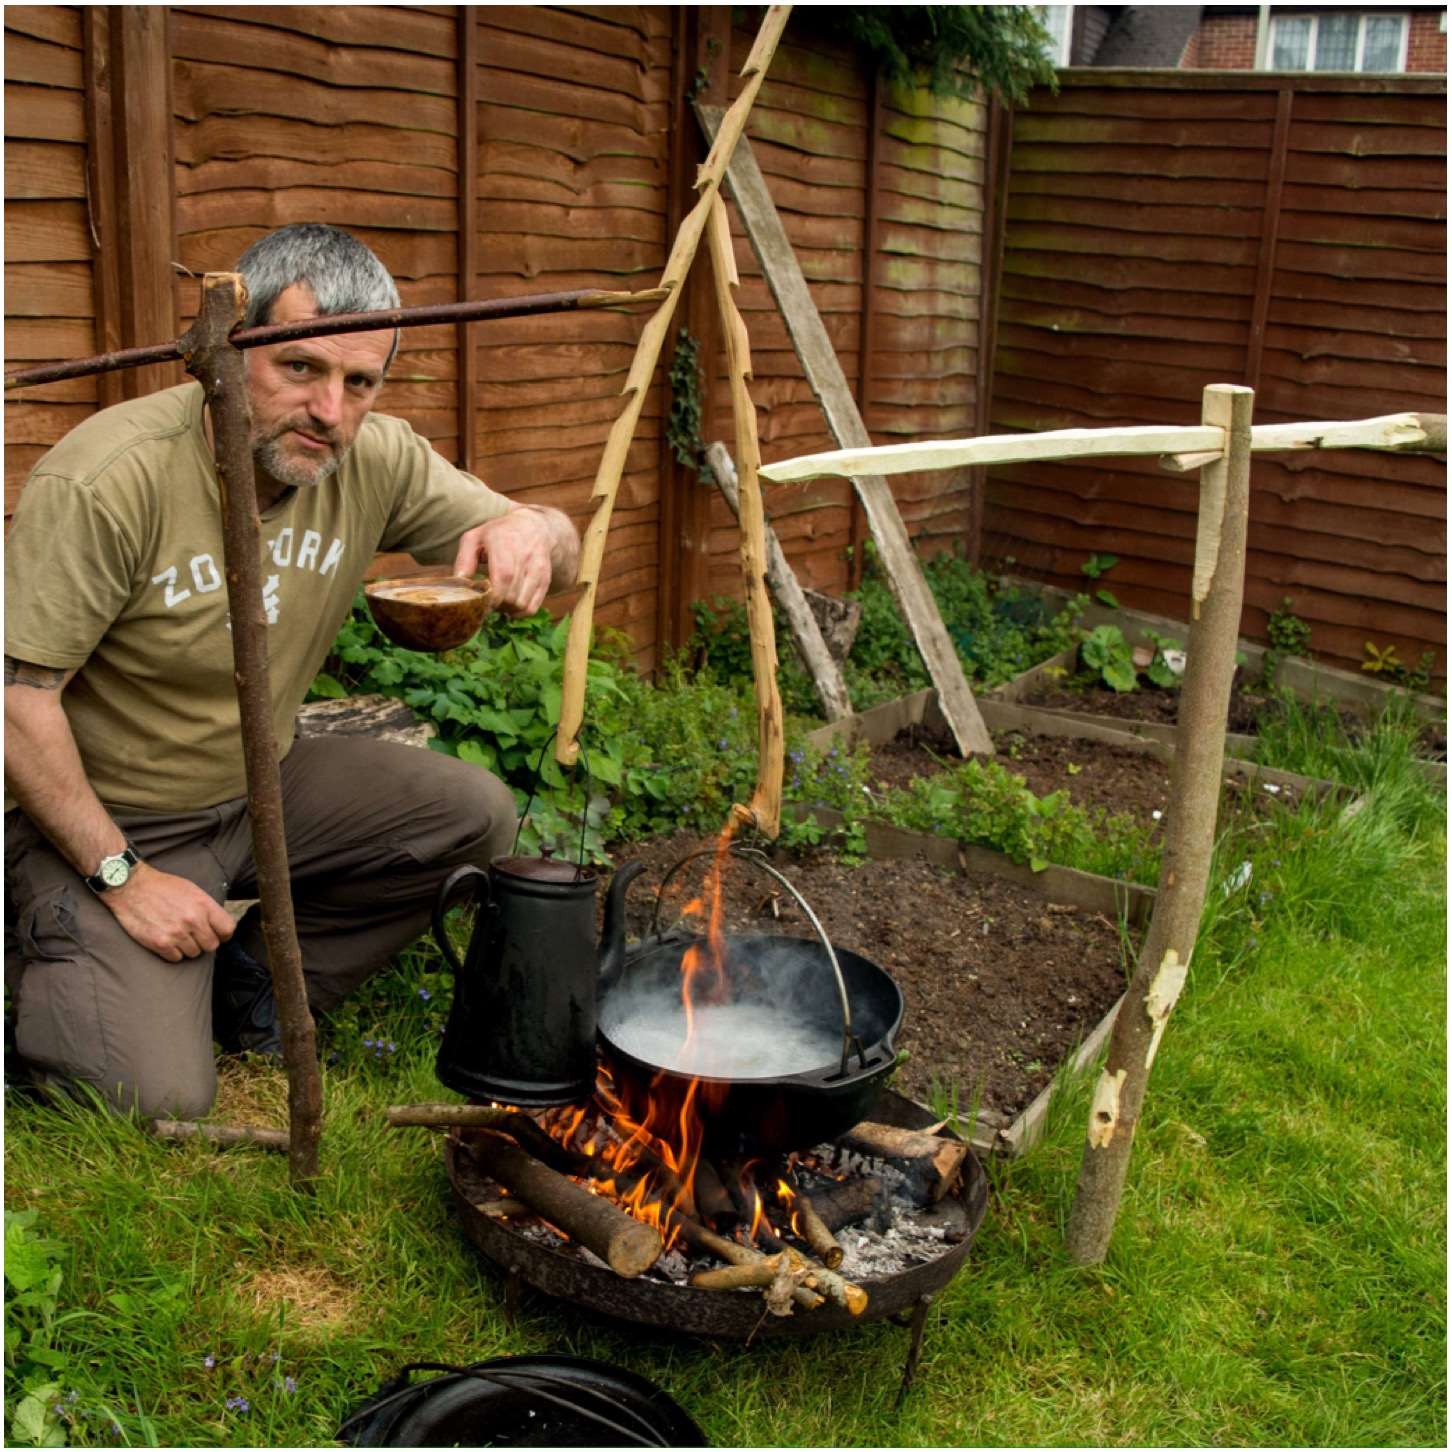
I have a few of these cranes so I set up another one to put the kettle back on.
Multiples
I had used an auger and a palm gouge to carve this one out so you can see it ended up with a round hole. No wedge was required as the hole was set at a slight angle.
The crane made with an auger and palm gauge
After the water in the dutch oven had boiled it was easy to raise it all up off the heat.
Easy to adjust the pot height
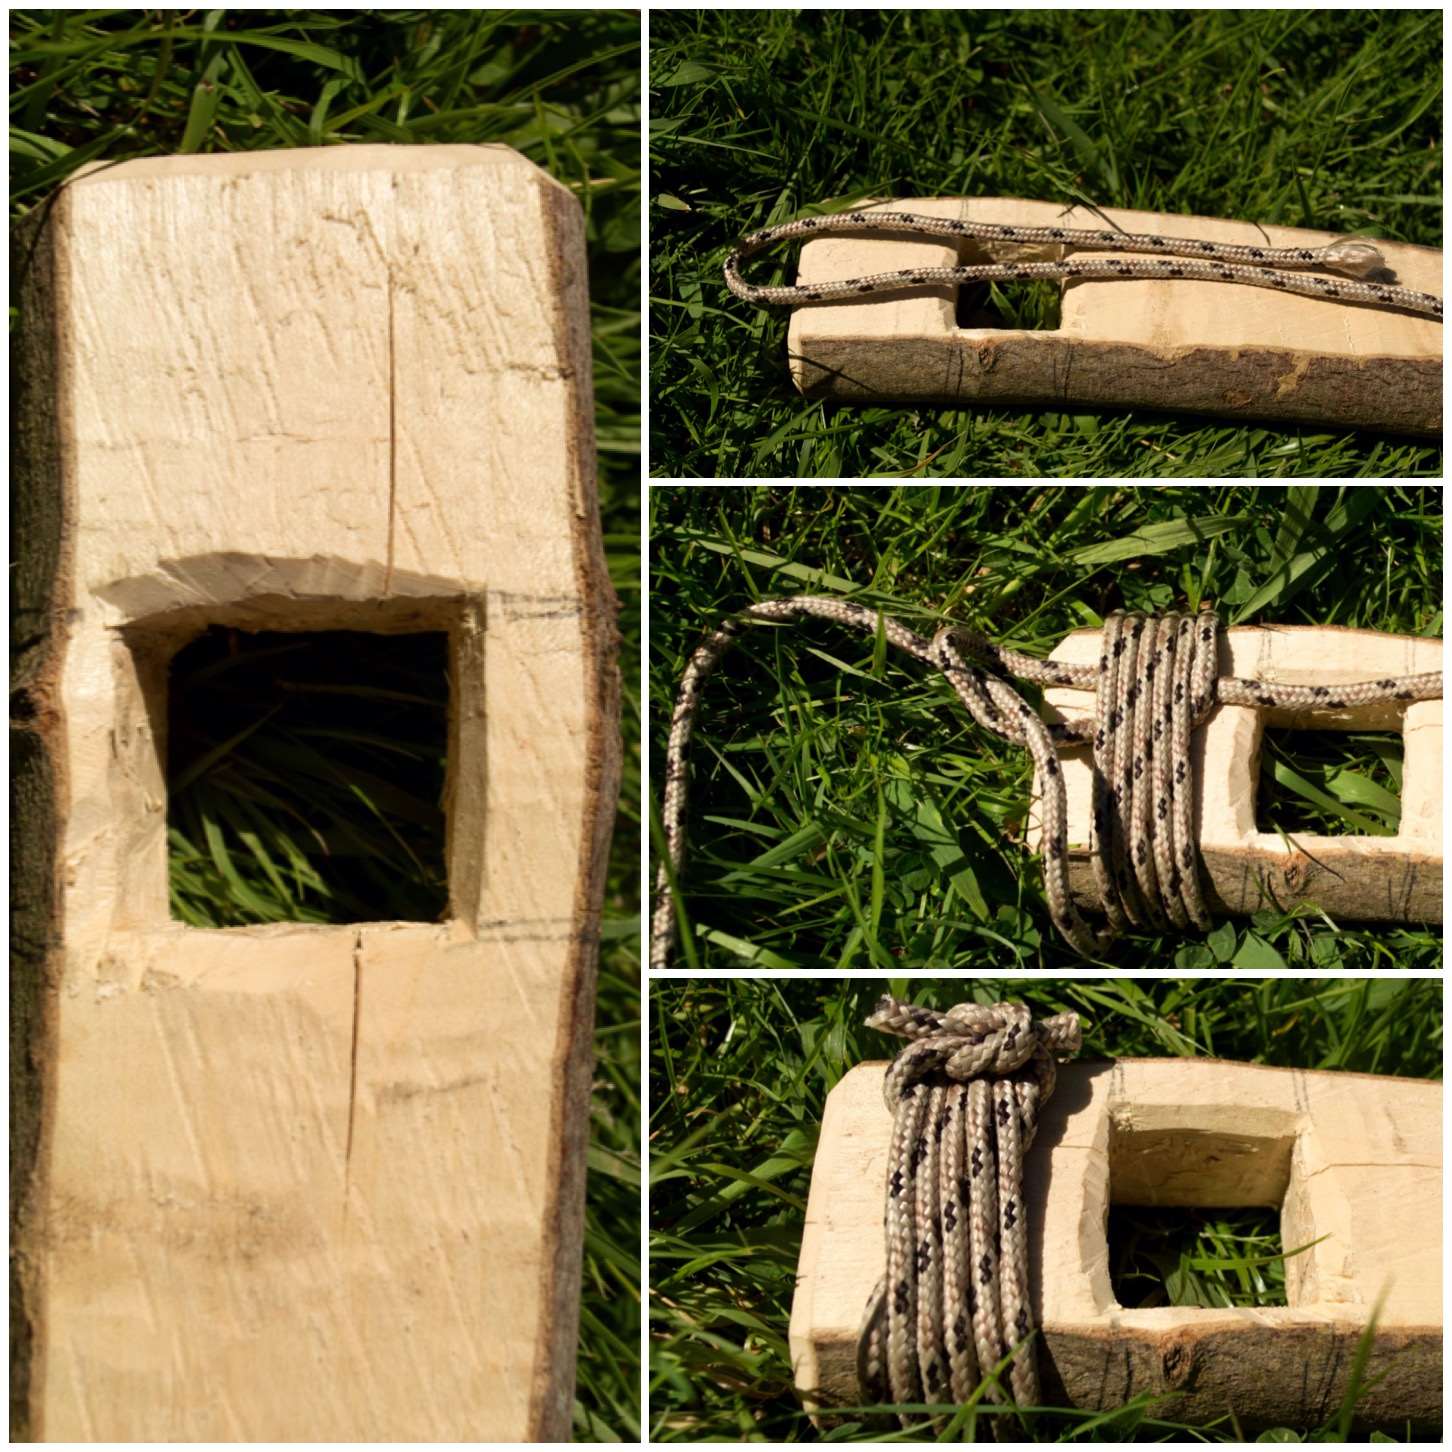
If you plan to use these cranes on a longer term basis they may develop a crack if you are using green wood. This happened to this crane about a week after I made it but I secured it with a bit of whipping. You can do this right at the beginning if you wish or when you see a split start to appear.
The whipping will be well clear of the flames so I am not worried that it will be burnt through.
Some Whipping
If I had not being taking pictures along the way I would have completed this rig in about an hour or so.
There are other ways of doing this and other tools you can use so I will leave it to your imagination but if you are someone who likes to tinker around the campfire then I would give this one a go.